


 | Getting Started-JetNet |     |
You can embed special processing in your application screens with Panther scripting language JPL. Because the JPL is saved with the screen or service component, it is accessible to the screen and its widgets.
In this lesson you learn how to:
This lesson shows how to use the JPL editor and describes its capabilities. The JPL procedures that you need are already written and stored in
tutorial.lib. The following diagram illustrates the JPL procedures you will enter in this lesson.
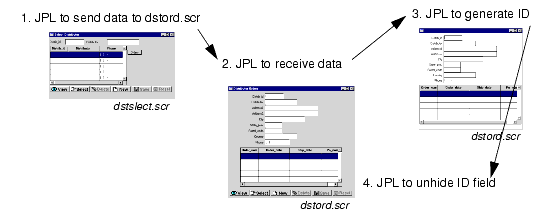

NEW or SELECT), which determines whether the screen is used to add a new distributor to the database, or view orders of an existing distributor.
Because the same procedure is called by two different screen objects, make the procedure available to both by attaching the JPL code to the screen's JPL Procedures property.
dstslect.scr client screen—click on an empty area in the screen to deselect all widgets.
The Properties window displays screen properties.
Panther opens the edit window for this screen's JPL:
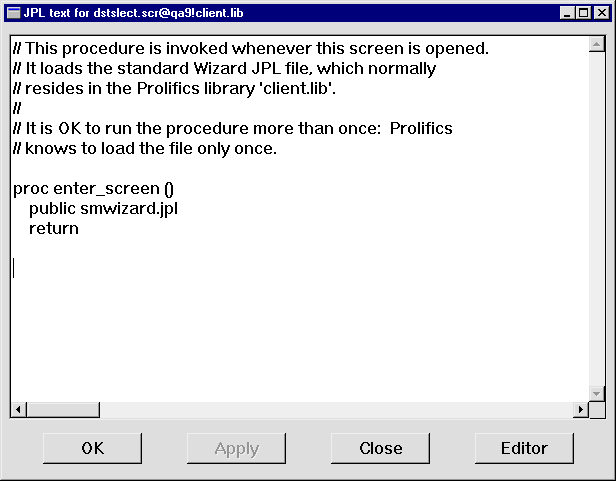
The screen entry procedure enter_screen, produced by the screen wizard, is already attached to the screen's JPL. It calls the public command, which makes the code in the smwizard.jpl module available to all application screens. Leave the wizard JPL code unchanged and add new procedures to this module.
enter_screen procedure. Insert the JPL procedure send_dst_data, which is stored in tutorial.lib: Insert From Library. The Open JPL Module dialog opens.
tutorial.lib by choosing Open and selecting it from the Open Library dialog.
The 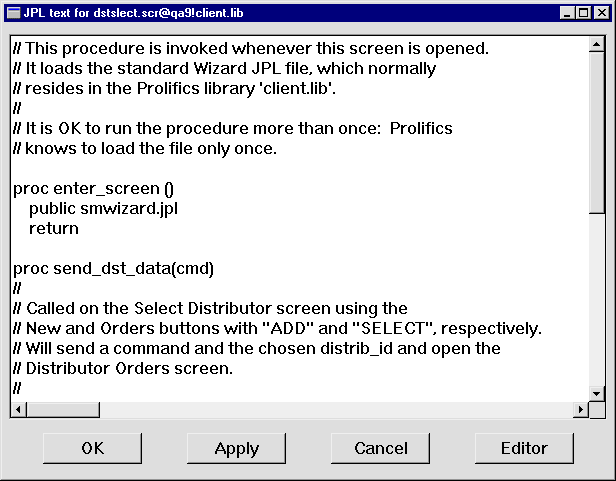
send_dst_data procedure is read into the JPL edit window:
proc send_dst_data(cmd)
{
	vars occ
	if (cmd == "NEW")
	{
		send DATA cmd, ""
	}
	else
	{
		occ= Master->grid_current_occ
		if (distrib_id[occ] == "")
		{
			msg emsg "First select a distributor."
			return 1
		}
		else
		{
			send DATA cmd, distrib_id[occ]
		}
	}
	call sm_jwindow("(+5,+5)dstord.scr")
	return 0
}
More About the send_dst_data Procedure
The
send_dst_dataprocedure is called when a user chooses either the New button or Orders button on the Select Distributor (dstslect.scr) screen. Each button supplies a different string argument to the procedure'scmdparameter, which controls how the procedure executes:
NEW is supplied as an argument. The send command puts this string into a specialized global buffer, or bundle. Bundle data is accessible to any other screen through the receive command.
SELECT is supplied as an argument. In this case, the send command puts two items into the bundle: the SELECT string, and the distributor ID in the selected distributor record. To ensure that a distributor ID is supplied, the procedure checks whether a record is selected from the grid, and issues an error message if one is not.
In both cases, the dstord.scr screen is opened through the call to sm_jwindow, which opens the Distributor Orders (
dstord.scr) screen at the specified(+5,+5)position: five grid units right and five grid units down from the calling screen.
 Save.
Save.More About the JPL Edit Window
You can write and edit JPL procedures within Panther's own edit window. This window offers access to JPL that is attached to a screen or stored in a library. You can also use any text editor that your system offers and that is specified in the application variable SMEDITOR—for example, Notepad on Windows or vi on UNIX. To access this editor:
 Direct to External Editor.
 External Editor.
When you exit the system editor, you resume in the JPL edit window, where you save your changes back to its source by choosing File
Save. You can also save library JPL modules to a new library member by choosing File
Save As
Library Member.
To save the current module's contents to a disk file, choose File
Save As
ASCII Text File. Use this option in order to print JPL code from your system, or to send it in an email.
You can insert the contents of other JPL modules into the current one: choose Edit
Insert From Library to insert from a library module, or Edit
Read File to read from a disk file. Panther inserts the file's contents at the cursor's current position.
send_dst_data procedure sends data that is needed by the dstord.scr screen. Now you must write a screen entry procedure for dstord.scr that captures this data and uses it to determine the screen's behavior when it is opened by the dstslect.scr screen's New or Orders buttons.
dstord.scr client screen and service component are not open, choose View Library TOC and open them from the
 client.lib and server.lib libraries, respectively.
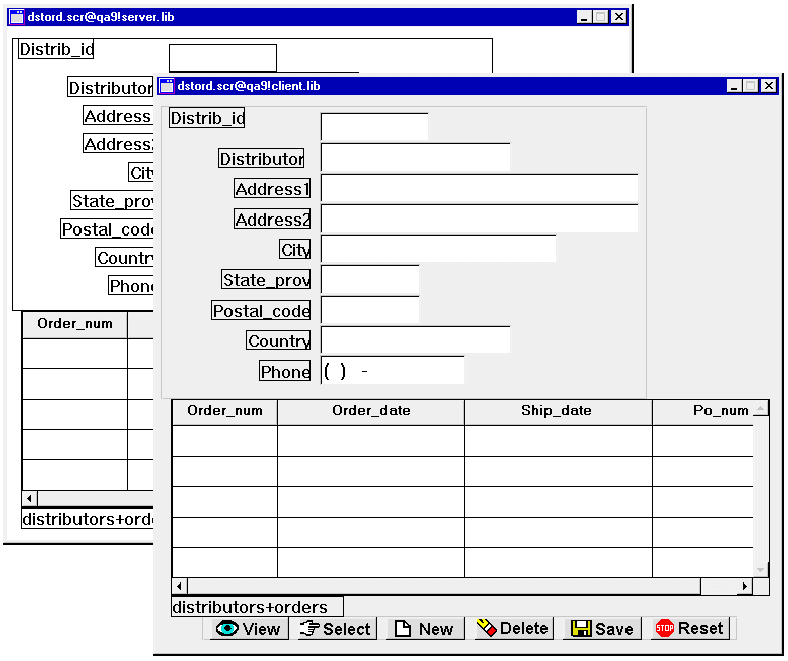
dstord.scr client screen by clicking in an empty space within its borders, so no widgets are selected.The JPL edit window opens and displays screen wizard-generated comments and code. Replace this with code that is in tutorial.lib.
enter_screen procedure by placing // at the beginning of each of the three lines.
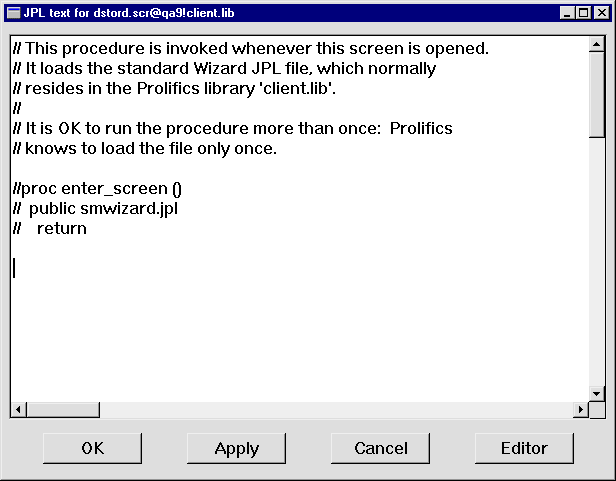
 Insert From Library.
 se_dst.jpl from tutorial.lib and insert the file by double-clicking on its name or choosing OK.

The enter_screen procedure is read into the JPL edit window:
proc enter_screen (screen_name, context)
{
	public smwizard.jpl
	vars cmd

	if ((context & K_EXPOSE) || !(sm_is_bundle("")))
	{
		return 0
	}
	else
	{
		receive DATA cmd, distrib_id
		if (cmd == "NEW")
		{
			LDistrib_id->hidden=PV_YES
			distrib_id->hidden=PV_YES
		}
		call sm_tm_command(cmd)
		return 0
	}
}
The enter_screen procedure is invoked as the dstord.scr screen's entry procedure. First, the public command makes the wizard-generated JPL module smwizard.jpl available to the application. Next, the procedure determines whether a user can add a distributor record or edit an existing one:
(context & K_EXPOSE); or no data was sent from the dstslect.scr screen—!(sm_is_bundle("")). If either condition is true, the procedure returns.
dstslect.scr screen. If data is received for distrib_id, it is placed in that widget.
cmd. If it evaluates to the string NEW, text widget distrib_id and its label LDistrib_id are hidden. sm_tm_command passes the value of cmd to call the appropriate transaction manager command, NEW or SELECT. If the NEW command is called, it prepares the screen to accept new data. If the SELECT command is called, it fetches the appropriate data using the value in distrib_id.
 Save).
More About Sharing Information Across Screens
The send and receive commands let you transfer data between screens in an application. The send command specifies the data items to send and stores them in a buffer. When the target screen executes the corresponding receive command, the buffered data is retrieved.
Panther provides several ways for screens to access each other's data:
screen_name!widget_name. However, this syntax is invalid for referencing between client screens and service components.
For more information about using
sendandreceivecommands and LDBs, CLICK HERE.
dstord.scr screen when a user chooses the New button on the dstslect.scr (Select Distributor) screen, and opens dstord.scr (Distributor Orders) in insert mode. You can now write a JPL hook function for the dstord.scr service component that generates a unique distributor ID number. This hook function executes during transaction manager processing and supplements the default transaction model.
dstord.scr service component by clicking in an empty space within its borders (no widgets should be selected).enter_service procedure and before the comments to the select procedure.
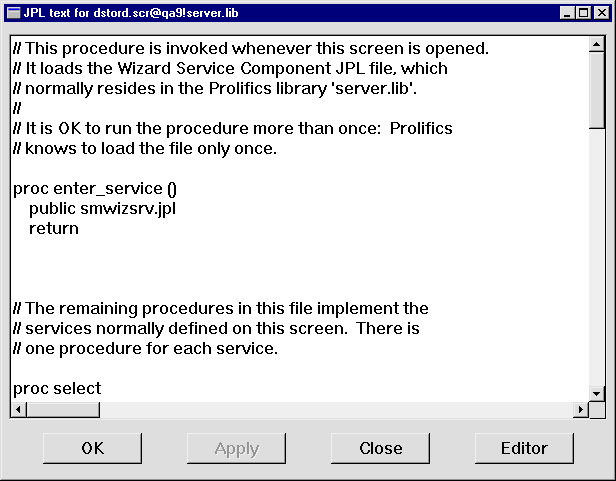
 Insert From Library.
evnt_svr.jpl from tutorial.lib and choose OK.
The tm_events_svr procedure is read into the JPL edit window:
proc tm_events_svr (event_id)
{
	if ((event_id == TM_INSERT_EXEC) && (distrib_id == ""))
	{
		DBMS ALIAS distrib_id
		DBMS QUERY SELECT MAX(distrib_id)+1 from distributors
		DBMS ALIAS // Clears prior aliasing
	}
	return TM_PROCEED
}
The tm_events_svr procedure checks whether an Insert transaction manager event occurred and the distributor ID is blank. If both conditions are true, the first DBMS ALIAS command ensures that the database value from the DBMS QUERY statement is written to the variable distrib_id.
To generate a unique identification number, the second DBMS ALIAS statement specifies a SELECT to find the highest distributor ID in the distributors database table and increments that number by one. The service component returns that number to the client.
More About DBMS QUERY and DBMS RUN Statements
In general, you'll use the transaction manager to automatically generate SQL statements. However, you can also write your own SQL. The Panther DBMS statements let you:
Refer to the Application Development Guide for more information.
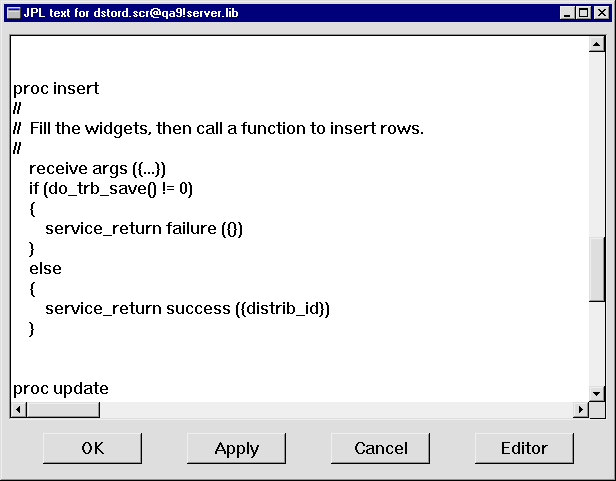
When a user adds the necessary distributor information and chooses the Save but ton on the Distributor Orders screen, the record must be inserted into the database. Here you modify the insert JPL procedure on the dstord.scr service component to explicitly add the distrib_id into the distributors database table.
service_return command.distrib_id within the braces of the service_return command:
service_return success ({distrib_id})
When you used the screen wizard to create the dstord.scr service component and client screen in Lesson 7, you specified two tables as their data source. When the wizard created these screens, it copied an invisible table view widget from each table's corresponding repository screen, distributors and orders. Each table view widget contains information about its repository screen's source table; it is created automatically when you import the table into the repository (Lesson 6).
Also, because dstord.scr is based on two tables, it also contains a link widget that specifies their join relationship. Like table widgets, link widgets are automatically created during the import process for each foreign key that is defined for a database table. When the screen wizard creates a screen with multiple table views, it copies from the repository the links that describe their relationship.
More About Table Views
Table views store the following types of database information:
Panther's transaction manager uses the information stored in table view and link widgets to determine the SQL statements to generate for each transaction command. The JetNet transaction model uses the service information to determine how to respond to service calls.
Also, table views let you easily modify the default transaction manager behavior.
At runtime, the transaction manager traverses all screen table views in the order that they are linked, and issues transaction commands to populate the master and detail sections accordingly. If a table view has a hook function attached to it, the transaction manager executes the function when it traverses that table view.
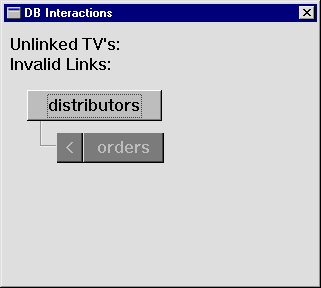
You attach a hook function to a table view through its Function property. In this case, you want to attach a hook function to the distributors table view. You can select a table widget and view its properties through either the Widget List or the DB Interactions window. In this instance, use the DB Interactions window to select the table view widget and access its Function property.
More About the Database Interactions Window
The Database Interactions window displays an interactive, graphical representation of a screen's table view widgets and link widgets. You can view the relationships between parent and child table views and the links that connect them. By selecting the toggle buttons representing these database objects you gain access to their properties.
dstord.scr service component, choose View DB Interactions.
The DB Interactions window opens, displaying a graphical representation of table views and links on the dstord.scr service component.
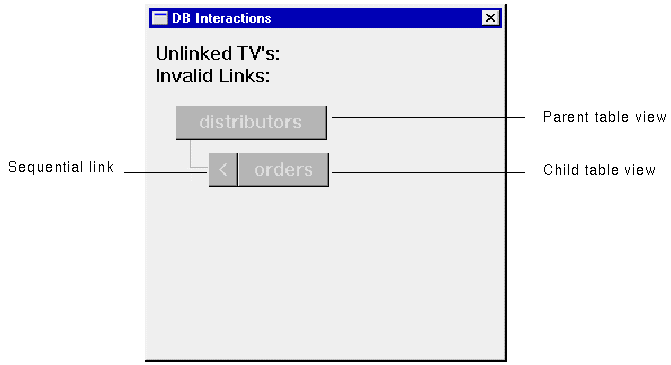
More About Sequential and Server Links
Link widgets are not visible at runtime, but are visible in the editor so that you can access their properties.
There are two type of links—sequential and server:
The Properties window now displays table view properties.
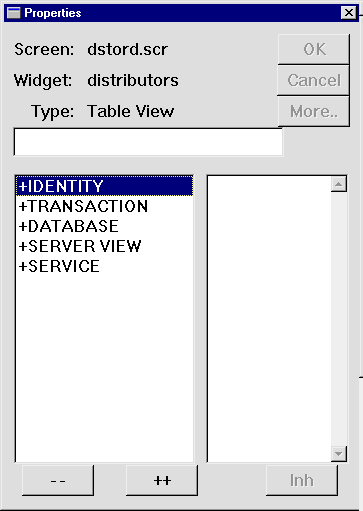
tm_events_svr.
dstord.scr determines whether to generate an ID, and saves it to the database if a new one is indicated. But the corresponding client screen is unaware of the new ID. Because the distributor ID field and its corresponding label are hidden when a new record is added, you can programmatically unhide these fields and display the new ID by changing their Hidden property when the record is saved.
dstord.scr client screen.enter_screen screen entry procedure and press Enter twice to insert blank lines between procedures. Insert From Library.
evnt_clt.jpl in the tutorial.lib and choose OK.
The tm_events_clt procedure is read into the JPL edit window:
proc tm_events_clt (event_num)
{
	if (event_num == TM_POST_SAVE)
	{
		distrib_id->hidden=PV_NO
		LDistrib_id->hidden=PV_NO
	}
	return TM_PROCEED
}
The tm_events_clt hook function checks whether a transaction manager Save command executed and, if so, unhides widgets distrib_id and LDistrib_id by changing their Hidden property to No.
More About Accessing Properties
All Panther objects and their properties can be accessed and most can be modified programmatically through JPL or C functions. You get or set properties for any screen or widget, or the application itself.
Refer to "Setting Properties Using the Property API" in Chapter 19 of Application Development Guide for information about JPL syntax for identifying screens and widgets, their properties, and property values. For a list of properties and their values, refer to Chapter 1, "Runtime Properties," in Quick Reference.
Now that the function tm_event_clt has been added to the dstord.scr client screen, this hook function needs to be attached to the screen's table view widget via its Function property. At runtime, the transaction manager uses this function to display the results to the user, confirming visually that a new distributor was added to the database.
dstord.scr client screen.
tm_events_clt in the Function property.
If a Save command executes and the new distributor record is committed to the database, the new distributor ID displays.
 DB Interactions to toggle the display.
You now have a working application. You can now test whether the application flow functions as designed.
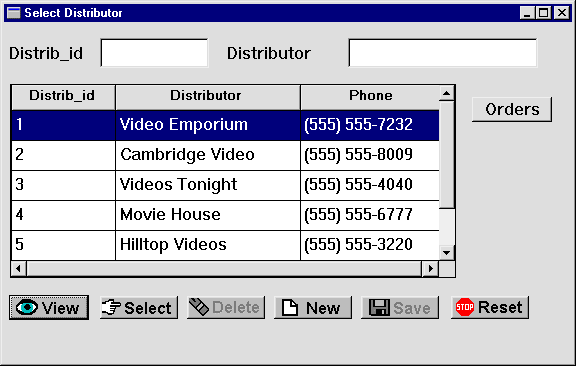
The Select Distributor screen opens.
All distributors in the vidsales database are listed.
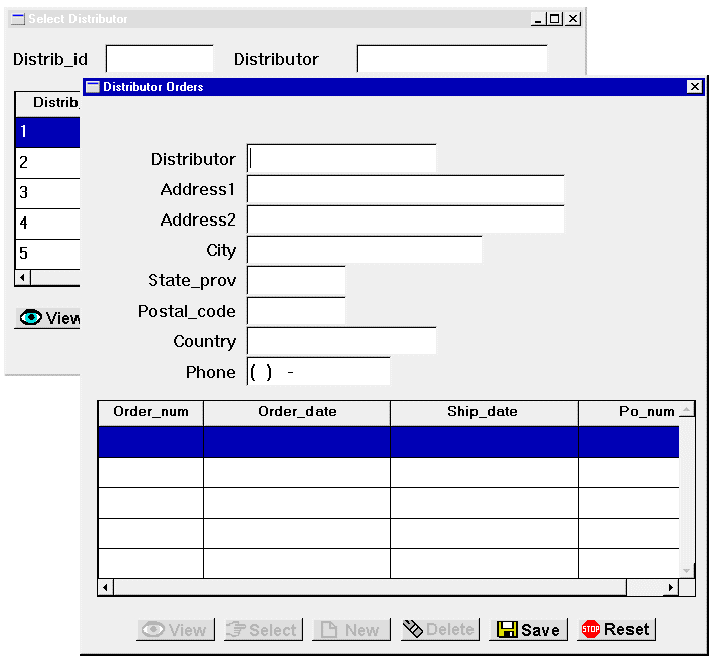
The Distributor Orders screen opens with all data fields clear. The distributor ID fields are not visible.
 .
.
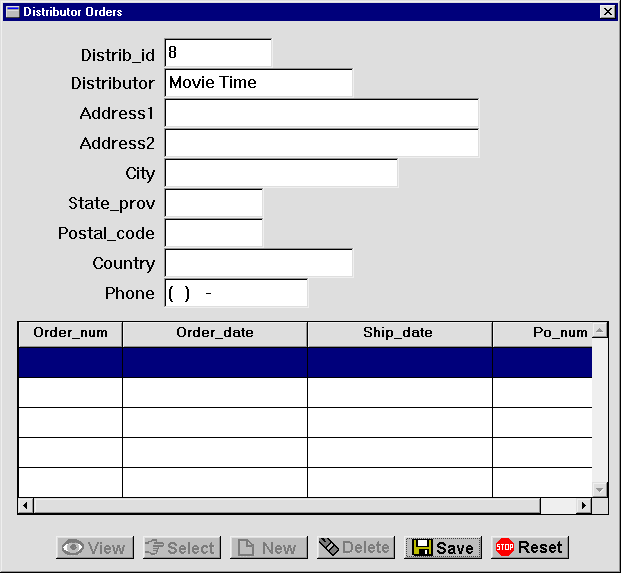
The distributor is added to the database and the ID is displayed in the Distrib_id field.
The Select Distributor screen regains focus. If you scroll down the list of distributors, notice that the new distributor is not listed. The next lesson shows how to enhance the screen entry procedure on this screen so users can see the latest data changes.
Select one of the distributors and then gain access to all of their orders.
Distrib_id 3 and choose the Orders button.
The Distributor Orders screen opens and displays all orders for the selected distributor. The screen entry procedure (enter_screen) on the dstord.scr client screen receives the ID you selected (3) and the SELECT command, and calls sm_tm_command to select the specified database record.
You inserted several screen-level JPL procedures: a pair of procedures that send data from one screen and capture it to another; and two other JPL procedures that tell the transaction manager how to handle database transactions. You did this by writing these procedures:
dstslect.scr client screen so that it is called whenever a user chooses either the Orders or New button. These buttons invoke this procedure via their Control String property, passing as an argument the command to issue. If a NEW command is issued, the dstord.scr client screen opens and is ready to accept new data. If a SELECT command is issued, primary key data for the selected distributor is submitted to the dstord.scr client screen.
You learned:
What did you learn?


