


 | Developer's-Panther WebSphere |     |
This chapter describes the process for building Enterprise JavaBeans in Panther.
Creating Service Components |  |
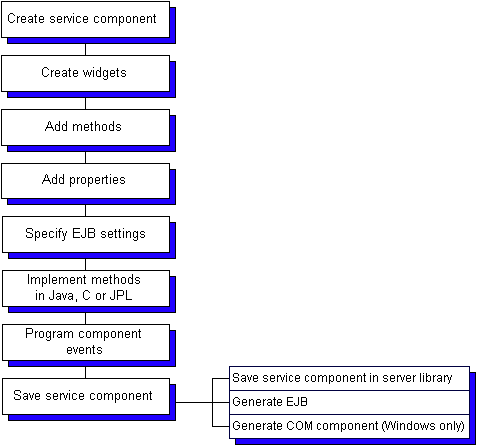
Service components perform the server-side processing in component-based applications. In Panther, building a service component saves a Panther service component in an application library and generates the EJB and/or COM component associated with that service component.
 New
New Service Component, which displays a blank service component.


Defining the Component Interface |  |
Components must have a defined interface. This interface consists of properties and methods supported by the component, together with information about those properties and methods, such as data types, parameter lists, and so on. This interface definition is the public face of your component; all interactions with application clients is by means of the properties and methods defined in this interface.
 Component Interface. The Component Interface window displays.
The Component Interface Window - Methods Section |  |
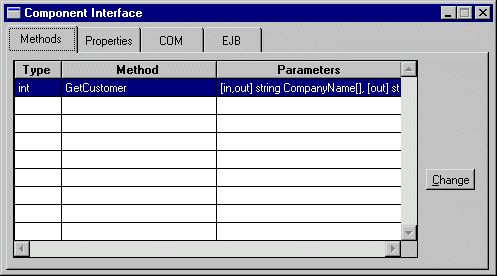
The Methods section of the Component Interface window lists the methods currently defined for the component. Each row in the grid corresponds to a method. The first column shows the method's return type, the second the method's name, and the third the method's parameters, prefixed by their kind and type.

Figure 5-1 The Methods window allows you to view and define the component's methods.
Methods correspond to the actions to be performed by the component. The code to implement the service component's methods can be written in JPL, in C, or in Java. The procedure or function must be in scope at runtime, and the name must match the method name. For information on implementing methods, refer to "Implementing Methods."
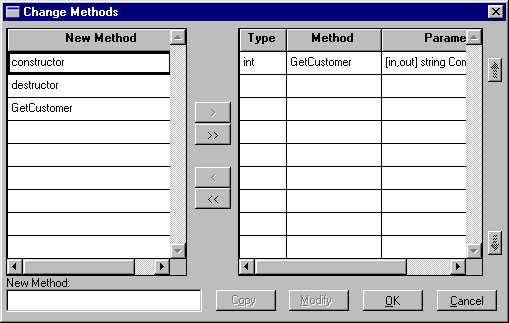
Choosing Change on the Methods section displays the Change Methods window where you can add a new method, copy an existing method, or edit a method. On the left, the New Methods column displays the JPL procedure names defined in the service component's JPL Procedures property. On the right, the grid contains the current list of methods, their types, and parameters.
Note: You must specify at least one method in order to generate an EJB.

Note: The method's return value cannot be an array. If this functionality is needed, the data should be returned in a parameter.
On the Change Parameters window, the Service Widgets column to the left displays the names of the fields on the service component. On the right, the grid contains the current list of parameters, their kind, and type. The order of the parameters is important; it is the order clients will use when calling the method.
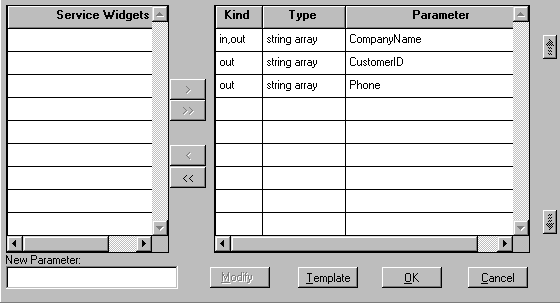
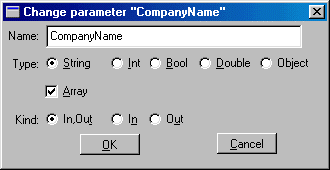
For example, the Template option generated the following JPL for the GetCustomer method:
proc GetCustomer
{
receive_args (CompanyName)

return_args (CompanyName, CustomerID, Phone)
}
The Component Interface Window - Properties Section |  |
The Properties section in the Component Interface window displays a grid that shows the properties supported by the component. Here you can add, modify or delete a component's properties. Often, properties are defined to contain information about the application state.
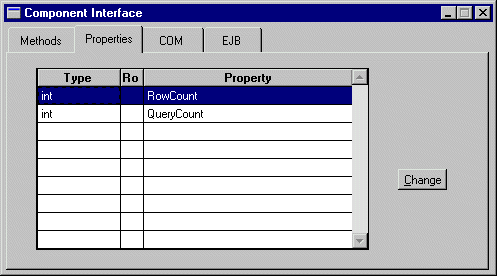
Figure 5-2 The Properties card allows you to add, modify, and delete a component's properties.
Each row in the grid corresponds to a property. The grid's columns correspond to the attributes of each property: Type, Read-only (Ro) and Property Name. The order in which the properties appear in this grid is irrelevant to the functionality of your component.
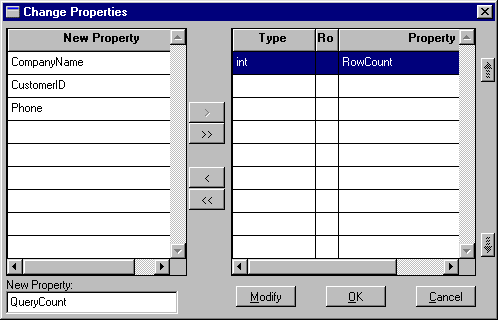
Choosing Change opens the Change Properties window where you can add new properties or modify current properties. The New Property column displays the widget names found in the service component. You do not have to choose one of the names on this list. You can enter the name of a global JPL variable or the name of a field that you will create later.
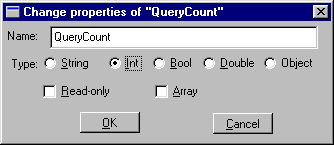
The specification for EJBs, unlike other types of components, does not contain support for reading and setting properties. In order to provide this support, the interface generated for the EJB contains a set method and get method for each property defined in the interface.
The Component Interface Window - EJB Section |  |
In the EJB section of the Component Interface window, you can specify:
Select General to specify the following:
Specifying General Settings

On the EJB section of the Component Interface, select Transaction to specify the transaction attributes for the bean. If you write your own JDBC, you can set transaction attributes for the methods in a bean.
BEAN_MANAGED, MANDATORY, NOT_SUPPORTED, REQUIRES_NEW, REQUIRED, and SUPPORTS. For more information on each setting, refer to "Transaction Attribute Settings."
SERIALIZABLE, REPEATABLE_READ, READ_COMMITTED, and READ_UNCOMMITTED. For more information on each setting, refer to "Isolation Level Settings."
If you write your own JDBC, you can set the Transaction Attribute to the following values. Each setting is briefly described below. For more information, refer to the IBM WebSphere Documentation.
BEAN_MANAGED—Indicator that the bean is an active participant in transactions and can call methods to explicitly manage transaction boundaries.
NOT_SUPPORTED—The container invokes bean methods without a transaction context.
Note:
Panther database drivers support only this option in the current version.
If you write your own JDBC, you can set the Isolation Level, which determines how isolated one transaction is from another, to the following values. Each setting is briefly described below. For more information, refer to the IBM WebSphere Documentation.
Isolation Level Settings
SERIALIZABLE—Prohibits dirty reads, nonrepeatable reads, and phantom reads.
REPEATABLE_READ—Prohibits dirty reads and nonrepeatable reads, but allows phantom reads.
READ_COMMITTED—Prohibits dirty reads, but allows nonrepeatable reads and phantom reads.
READ_UNCOMMITTED—Allows dirty reads, nonrepeatable reads, and phantom reads. (Default)
Note:
Panther database drivers support only this option in the current version.
Select Environment to specify user-defined environment variables and their values for use in Java business logic that implements the bean's methods. These variables are available only at the bean's scope; they are unavailable to the application's environment.
How to Specify Environmental Settings
Implementing Methods |  |
A method is a piece of work that a client can request the component to perform. The component implements each of its methods by means of a function (written in C, JPL or Java) that has the same name as the method's name.
To implement a method in JPL, the JPL procedure must be in scope when the service component is open at runtime. The simplest way to do this is to use the Template option on the Change Methods window to write a JPL procedure to the clipboard and then paste that procedure in the screen-level JPL (under Procedures JPL Procedures). However, the procedure could also be written in a separate JPL module and made available with include or public commands.
A JPL procedure that implements a component's method gets no parameters passed directly to it. To gain access to the method's in and in/out parameters, as sent by the client making the method request, use the receive_args command. For example, a sample JPL implementation of a component's method would be the following procedure:
proc my_method()
{
	vars id, name
	receive_args (id, name, address, city, state, phone) ...
}
The JPL command receive_args is followed by a list of targets. The values of the in and in/out parameters from the method call are placed in these target locations. The out parameters are skipped, therefore if a given method call has two out parameters, the first and third, only the values of the second, fourth and following parameters would be copied into the target list for the receive_args command.
The items in the target list must have a valid JPL syntax. In the example above, the first two items on the target list are variables declared locally in the procedure. For the target list to be valid, the latter four items on the target list must correspond to fields on the screen, to JPL global variables, or to JPL variables declared in the screen's unnamed JPL. Since any valid JPL syntax can be used, you could copy an incoming parameter into a property by using the property API.
The client that made the request for a method is expecting values passed back to it in the in/out and out parameters. It also expects a return value for the method as a whole, and it might also be checking for error codes, to determine whether some error has occurred while attempting to perform the method. To send these values back to the clients code like the following would be used:
proc my_method()
{
	. . .
	return_args (id, name)
	raise_exception -2
	return 0
}
Note: For information on calling methods from a client screen, refer to page 7-5, "Accessing the Component's Methods."
The return_args command works similarly to the receive_args command. The values of the JPL variables in the list will be written to the in/out and out parameters of the method, based on the order of the parameters in the method's definition.
The raise_exception command is used to send an error code back to the client. The client's error handler can then decide what to do based on the value sent.
The JPL return command is used to provide the return value for the method.
For return types other than integer or object, you must declare the return type in the proc statement, for example:
string proc s_method()
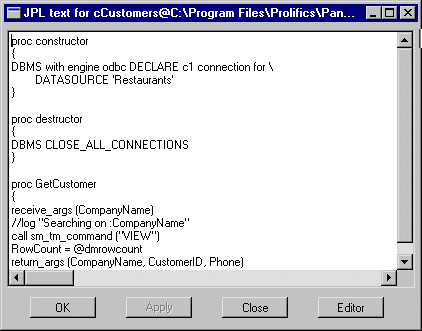
Figure 5-3 This sample screen-level JPL module implements the component's methods.
JPL variables declared in the component's unnamed procedure are available only in the component-level JPL; they will not be in scope for widget-level JPL or for calls from the client. To increase the scope of the variables, use the JPL global command.
In C, rather than the JPL commands receive_args, return_args, and raise_exception, you would use the following functions:
As in JPL, the functions sm_receive_args and sm_return_args take a list of Panther variables as a single string. The variables can be comma or space-delimited and can include the use of the property API syntax to refer to properties of fields on the component.
To make your C code accessible at runtime, your code must be packaged in a shared library and loaded at application startup.
Note:
For more information on calling your C functions in EJBs, refer to Appendix C, "Adding C Functions."
To implement a method in Java, the service component must have a Java Tag property set to correspond to a class which implements The Implementing Methods in Java
ScreenHandler. This class should have a method whose return type corresponds to the return type specified for the method (such as int, double, boolean, string or object) and which takes two parameters, a ScreenInterface and a WSFunctionsInterface.
WSFunctionsInterface contains the following methods:
get_bean
public native PantherSessionBean get_bean()
log
public native int log(String message)
raise_exception
public native void raise_exception(String message)
receive_args
An EJB can also create other EJBs and, in a Panther application, open Panther screens. Each component operates in a different context; each component also has its own form stack. This means that the property API cannot be used to pass information between EJBs; instead, you must use the public methods of the beans.
Calling Other Enterprise JavaBeans
Programming Component Events |  |
For service components, the Procedures category (in the Properties window) contains properties for two events:
Entry and Exit Functions can be written in JPL, Java or C/C++. Typically, these functions are used to open and close database connections.
For JPL, enter a procedure name in the Entry and/or Exit Function properties and then access the JPL Procedures property to enter the JPL commands.
For Java, enter a Java Tag (under Identity), which is the name of the Java event handler for the entry and/or exit events. For more information on using Panther's Java event handlers, refer to Chapter 21, "Java Event Handlers and Objects," in Application Development Guide.
For C/C++, the function named in the Entry and/or Exit Function properties must be packaged in a shared library and loaded at application startup. For more information on calling your C functions in EJBs, refer to Appendix C, "Adding C Functions."
Generating Enterprise JavaBeans |  |
An Panther-built EJB consists of:
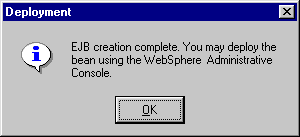
How to Save a Service Component and Generate an EJB
server.lib, if one does not already exist. save As
 Library Member. Enter a name, and select the application library to save it in, generally
 server.lib.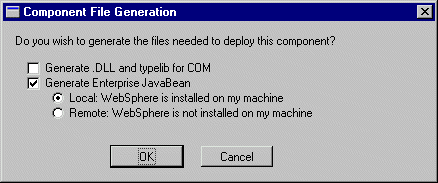
For the next step, deploying the EJB, refer to Chapter 6, "Deploying Enterprise JavaBeans in WebSphere."
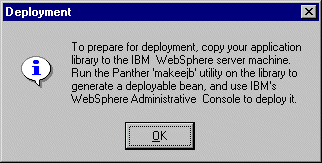
You need to:
server.lib) to the application server's working directory.
Generating the EJB results in the following Java files:
In addition to the Java files, generating the EJB also produces a batch file that is used to prepare the EJB for deployment. In Windows, this files ends with a .bat extension and in UNIX .sh.
Sample Enterprise JavaBeans |  |
The Panther distribution contains sample EJBs. For more information about the EJB samples, refer to Appendix B, "Sample Applications."


