

 | Getting Started-2-Tier |     |
A Panther client can run either on UNIX or Windows; instructions are given for both. Illustrations in this tutorial show the Windows version.
In this lesson you learn how to:
In order to start the Panther client on Windows, you must provide setup information in the client's initialization file. A tutorial-specific initialization file
Note:
Before beginning any of the steps below, be certain that you have installed the Panther software according to the steps listed in the Installation Guide.
Setting up on Windows
tutorstd.ini is in the Windows directory. Variables in this file must be set as follows:
Windows SMBASE=C:\prolifics\panther
To run this tutorial as a web application, all screens that you design must be stored in a library located in the web application directory (refer to "General environment settings").
In order to open the client library when the editor starts up, set SMFLIBS to its full path name:
SMFLIBS=ApplicationDirectory\client.lib
Note: If the web application directory is on a remote host, your client must have access to that host's file system.
If you are setting up the client on UNIX, it is assumed that you are running under either the Korn or Bourne shell. Before setting up, you need to know the following:
usr/prolifics.)
Panther is installed at: ______________________
usr/prolifics/licenses/license.dat.)
This tutorial recommends that you create a local directory under your home directory and change to it. You copy all necessary files to the new directory and perform all tasks in it. The tutorial uses this directory as the Panther application directory; in practice, the application directory is located in a central location that is accessible to the development team.
Note:
Before beginning any of the steps below, be certain that you have installed the Panther software according to the steps listed in the Installation Guide.
Create an application directory
proltut. At the command line, type:
mkdir proltut
proltut directory:
cd proltut
setup.sh from the Panther installation's config directory to the proltut directory. This file contains environment setup information that is required by Panther, such as path names and terminal information. Usually, a copy of this file resides in the application directory and in each developer's working directory.
cp PantherInstallDir/config/setup.sh .
where PantherInstallDir is the full path name to the Panther installation (/usr/prolifics by default).
You set the Panther environment on UNIX with the setup.sh file. Edit your copy of this file to include information needed by the Panther software such as location of the installation and license file.
setup.sh file using an editor. Make the following changes:usr/prolifics by default. If Panther software is installed at another location, then set SMBASE to the full path name of the correct directory (as noted above).
SMTERM=X. If you are running under UNIX in character mode, refer to the Configuration for information on using video files, which tell Panther how to drive the terminal display.
setup.sh file.. ./setup.sh
This applies the settings in setup.sh.
proltut):
cp $SMBASE/samples/proltut/* .
This copies the libraries ( client.lib, tutorstd.lib ) and the sample database to the proltut directory.
Each time you log onto your UNIX machine, you must run setup.sh again before running the tutorial:
. ./setup.sh
After you provide the required setup information, you can start the Panther editor and begin building your application's components.
prodev & at the command line.
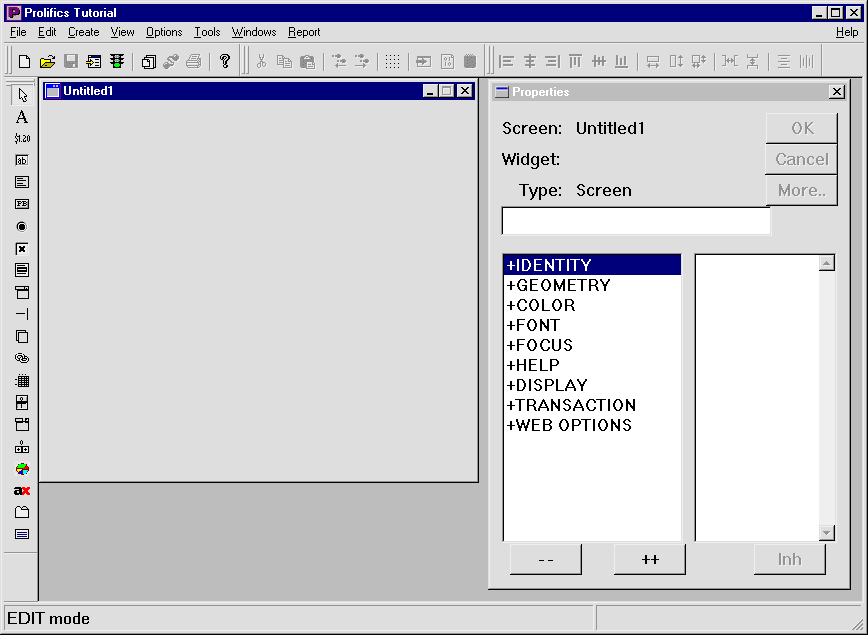
The editor workspace opens:
Many commonly used commands and tasks can be executed by choosing the appropriate toolbar item. This tutorial acquaints you with most of the File menu commands that are associated with these toolbar buttons:


More About Toolbars
The editor's toolbar:
You can also use the Panther menu bar to create menus and toolbars to attach to individual screens or to the application as a whole.
A tutorial library is provided with the Panther installation and is stored locally on your workstation or PC.
 Library TOC.
The Library Table of Contents opens:

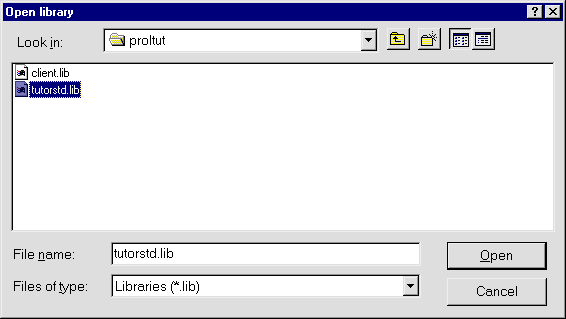
The Open Library dialog box opens:

tutorstd.lib and choose Open (or OK on Motif).
The Library Table of Contents dialog is updated, and tutorstd.lib is added to the list of open libraries.
In this lesson, you performed these tasks:
tutorstd.ini. On UNIX, you applied the settings in the setup.sh file. In practice, you edit all of the initialization files provided with your installation. You also started the editor and opened a library.
You learned:
What did you learn?


