

 | Web Development |     |
The Web setup manager utility creates or updates the configuration files needed by your Web application. After you install your Panther Web application server, you can run this utility from any Web browser having access to the HTTP server's programs.
Running this utility creates or updates:
The Panther Web application server supports three types of requester programs:
proweb or, for Windows, proweb.exe.
proweb.isa.
roweb.nsa.
For a description of the requester process, refer to "Requester Program."
For more information about settings in your web initialization file, refer to Chapter 12, "Web Initialization Options."
Using the Web Setup Manager |  |
Each Panther web application must have an initialization file, which contains configuration settings for the application. The Panther Web Setup Manager helps you create a new initialization file or update an existing one. The steps in this chapter help you create a new Panther web application.
In order to use this utility, you must have completed the installation of the Panther web application server and know the following information:
- The location of your Panther web installation.
- The location of your HTTP server's program directory (usually called cgi-bin or scripts).
For information on setting up your web application server, refer to Chapter 2, "Web Application Setup."
To create a new Panther Web application:
- Start your web browser (for example, MS Internet Explorer, Mozilla Firefox).
- In the URL field, type the location of the Panther Web Setup Manager:
http://hostMachineName/webProgramDirectory/websetup(For example,
http://myhost.com/cgi-bin/websetup).
By default, Create an Application is already selected
You assign each Web application a unique name which is used to name the application's requester program and the application's initialization (.ini) file.

- For Application Name, enter the unique name you are using to identify your Web application.
- For SMBASE, enter the full path pointing to the Panther Web installation.
- For Program Directory, enter the path to your HTTP server's program directory.
Note: This should be a directory path, not a URL.
- Select the web application type: CGI, NSAPI, ISAPI.
Note: All HTTP servers support CGI. Check with your HTTP server administrator to find out if NSAPI or ISAPI support is available.
- Choose Continue.

The program creates both a
.inifile and an executable specific to your application—in the sample Windows screen,vidstore.iniand the executablevidstore.exe). The next screen will tell you that both files have been created.- Choose OK.

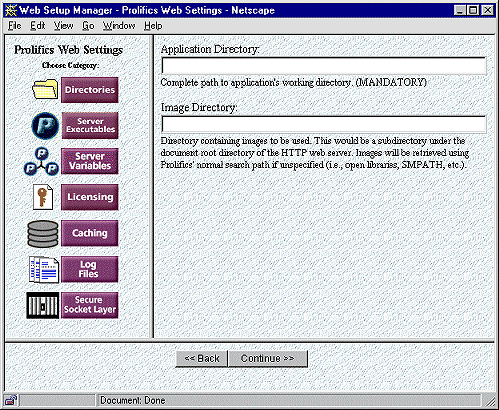
Each Panther web application can have its own settings which are stored in the initialization file. In the left-hand frame, icons represent the different categories of settings. In the right-hand frame, there are fields to enter your settings with an accompanying explanation of each setting.

- Settings which you should set or double-check include:
- Choose Continue.
Your Panther web application also needs its own environment settings.

- Settings which you should set or double-check include:
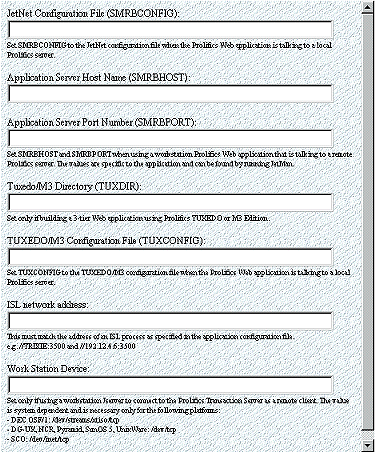
(For JetNet and Oracle Tuxedo applications) Depending on whether you are running the Panther web application server on a separate machine from your Panther application server, your settings under 3 Tier Configuration will be different.
- Choose 3 Tier Configuration from the left-hand menu.
(If running Panther application server and Panther web application server on the same machine):In JetNet Configuration File (SMRBCONFIG), type the directory location of your
broker.binfile. (It is generally located in the application directory.) Leave the lines for SMRBHOST and SMRBPORT blank.
(If running the servers on different machines):Leave the line for JetNet Configuration File (SMRBCONFIG) blank. Enter the information for SMRBHOST and for SMRBPORT.
Under Work Station Device, check the platform list and enter the location of the tcp directory if needed.
- Choose Continue.
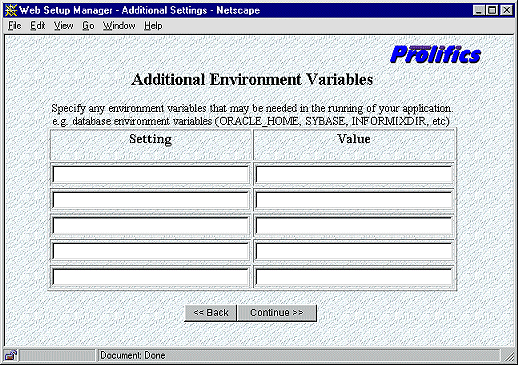
Under Additional Environment Variables, you can enter settings for databases or other optional web settings.
- For database settings, use an Oracle database as an example. Enter the environment variable name under the Setting column (for example,
ORACLE_HOME) and enter its value in the Value column (for example,/usr/oracle).- For JetNet and Oracle Tuxedo applications, specify access to the JIF file on this screen. Under Setting, enter the environment variable SMTPJIF; under Value, enter the name of the JIF file located in an application library (for example,
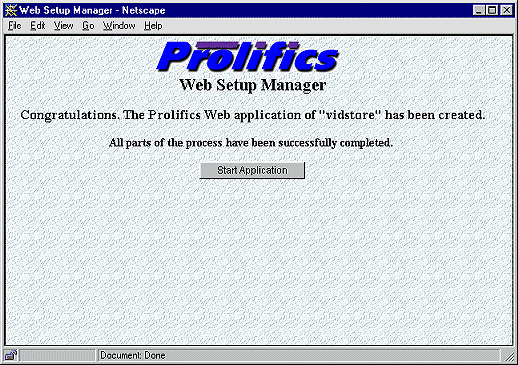
jif.bin).- After completing any necessary information, choose Continue. A screen informs you that your Panther Web application server file has been created.


