

 | JDB SQL Reference |     |
JISQL is a graphical tool you can use to:
Starting JISQL |  |
To start JISQL, do either of the following:
$SMBASE/util/jisql (under UNIX)
$SMBASE\util\jisql (under Windows)
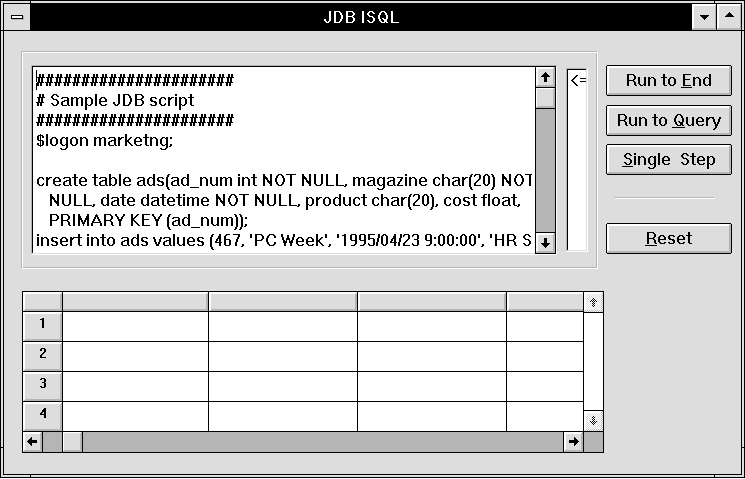
The JDB ISQL window opens.
The JDB ISQL window provides an area into which you enter a SQL script. Menu options allow you to:

To exit JISQL, choose File JDB performs an automatic Before you can create or view database tables or perform any other database operations, you must connect to the database. (If your SQL script includes a command to connect to the database, you need not connect as described here before executing the script.)
 Exit.
Exit.
COMMIT when you leave a JISQL session. Issue a $ROLLBACK macro command if you do not want to save your database changes.
JDB Database Connections
To connect to an existing database:
 Connect. A file selection dialog box opens.
When you create a new database, you must connect to it before defining any of its tables.
Refer to page 5-4 for instructions on creating and connecting to a new database.
To disconnect from the current database:
 Disconnect.
You can be connected to only one database at a time. If you connect to a database while a previous connection is still current, JISQL automatically disconnects from the first database before connecting to the next one.
Executing Operating System Commands from JISQL
To execute an operating system command from JISQL:
 System Command. A dialog box opens with a field for you to enter the command.
Creating a New Database |  |
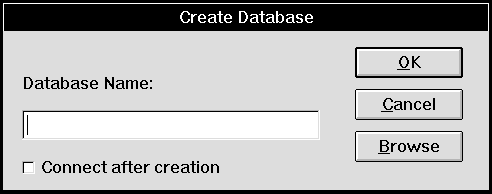
 Create Database. The Create Database dialog opens.

If you selected the Connect After Creation check box, the status line message confirms that you are connected to the database. If you did not select this check box, the message indicates only that the database was successfully created.
Creating Database Tables |  |
Use the JISQL graphical interface to add tables to a newly created database or to an existing database.
 Create Table. The Create Table dialog box opens.

To populate the table, create and run a SQL script containing the applicable INSERT statements. For information on entering and running SQL scripts under JISQL, refer to page 5-18.
The Column Definition Entry area of the Create Table window allows you to add, modify, or delete columns in the database table you are creating. In addition, the Create Table window provides push buttons that enable you to rearrange the columns in the table.
NOT NULL check box if null values are not to be permitted in this column.
Note:
NULL values are not permitted in primary key columns.
You can modify or delete a column at any point prior to completing the table definition.
Note:
You cannot remove NOT NULL from a primary key column.
Select a column in the summary area of the Create Table window. Choose the Move Up or Move Down push button to move it one place up or down. Continue until the column is in the desired location.
Defining Keys for a Database Table |  |
Push buttons in the Create Table window allow you to define primary, unique, and foreign keys into the table. Refer to page 2-4 for an explanation of primary keys. Refer to page 2-6 for an explanation of foreign keys.
If any column required for a key was not defined as NOT NULL when it was created, JISQL makes the necessary change to the column definition and displays an appropriate message. Acknowledge the message by choosing OK.
The Primary Key and Unique Key Definition windows are similar in appearance and function. Each consists of:
From the Create Table window, choose the Primary Key button to open the Primary Key Definition window, or choose Unique Key to open the Unique Key Definition window.
When you are finished working in the Primary Key or Unique Key Definition window, choose OK to save your changes and return to the Create Table window; or choose Cancel to return without saving your changes.
Once the applicable key definition window is open, you can add, modify, or delete keys as follows:

To add a new primary key or unique key:
 . The column name is removed from the Select Columns area and appears in the Key Columns area.
 . The column name is removed from the Select Columns area and appears in the Key Columns area.
 Remove. The column name is removed from the Key Columns area and appears in the Select Columns area.
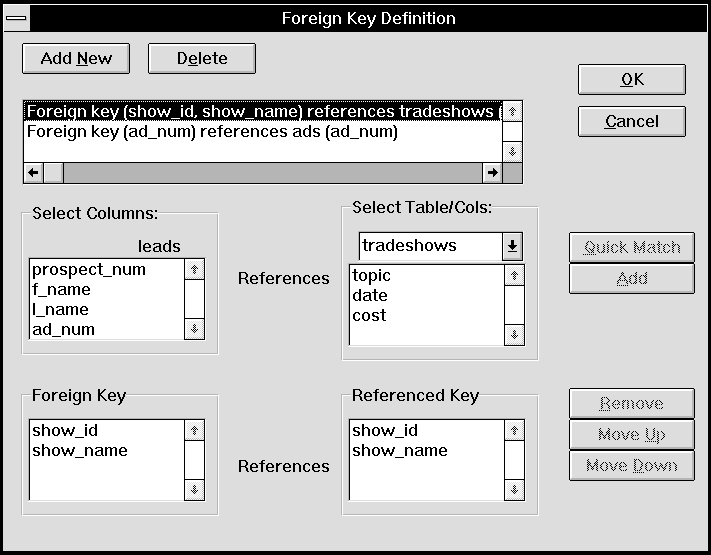
The Foreign Key Definition window consists of:
From the Create Table window, choose the Foreign Key button to open the Foreign Key Definition window.
When you are finished working in the Foreign Key Definition window, choose OK to save your changes and return to the Create Table window; or choose Cancel to simply return without saving your changes.
When the Foreign Key Definition window is open, you can add, modify, or delete foreign keys as follows:

To add a new foreign key:

Maintaining a Database |  |
With JISQL, you can perform the following database maintenance functions without having to write SQL code:
Notes:
To perform database maintenance operations involving the data itself, such as populating tables, viewing data, etc., you must explicitly write and execute the required SQL statements. Refer to page 5-18 for information on running SQL interactively using JISQL.
Displaying Database and Table Definitions
 Describe. The Describe Table window opens, displaying a list of all the tables in the database.
 Drop Table. The Drop Table window opens.
 Drop Database. The Drop Database window opens.
Running SQL Interactively |  |
Using JISQL, you can run SQL commands either by entering them into the onscreen scripting area or by specifying an ASCII file that contains the desired SQL script. In addition, when you create a SQL script in JISQL, and then save it to a file for future use.
Under JISQL, you can execute any SQL statement that is available in JDB. Refer to page 6-1 for a detailed description of the SQL commands that can be used with a JDB database.
Your SQL script can also contain JISQL macro commands. These macros simplify transaction processing and database maintenance. Refer to page 5-21 for a complete description of the JISQL macros.
JISQL runtime options enable you to control the execution and output of your SQL script. Refer to page 5-22 for a description of the available options and commands.
The JDB ISQL window contains an area for entering and editing your SQL script.

Either type directly into the scripting area, or read the script in from an ASCII text file.
To read a text file into the scripting area, choose File Open Script; a file selection dialog box opens for you to specify the file you want to read in. By default, only filenames ending with the
 *.sql extension are listed in the dialog box.
You can do either of the following:
 Editor (or press PF2). The editor specified in the environment variable
 SMEDITOR is invoked (refer to page 2-6 in the Configuration for details on specifying the variable).
Do either of the following:
To save SQL script displayed in the scripting area:
 Save Script—The displayed script is saved to the file from which it was read, replacing the original contents of that file with the current script.
 Save As—Specify the name of new file in the file selection dialog box.
Use a *.sql extension in naming SQL script files, since only files with this extension appear in the file selection dialog box when you choose File Choose File SQL scripts to be executed under JISQL can consist of:
 Open script.
To clear the scripting area:
 New. The scripting area and data output area are cleared in preparation for entering and running a new script.
Script Format and Syntax
Only one statement is permitted per line. Each SQL statement and JISQL macro command must be terminated with a semicolon (;). A line without a trailing semicolon is concatenated with the next line until the semicolon is reached. Therefore, one statement can span multiple lines.
The macros provided in JISQL are listed in Table 11. Each macro begins with a dollar sign ($) and can be typed in either all uppercase or all lowercase, but not in mixed case. Each macro command must be terminated with a semicolon (;).
JISQL Macro Commands
Executing SQL Scripts
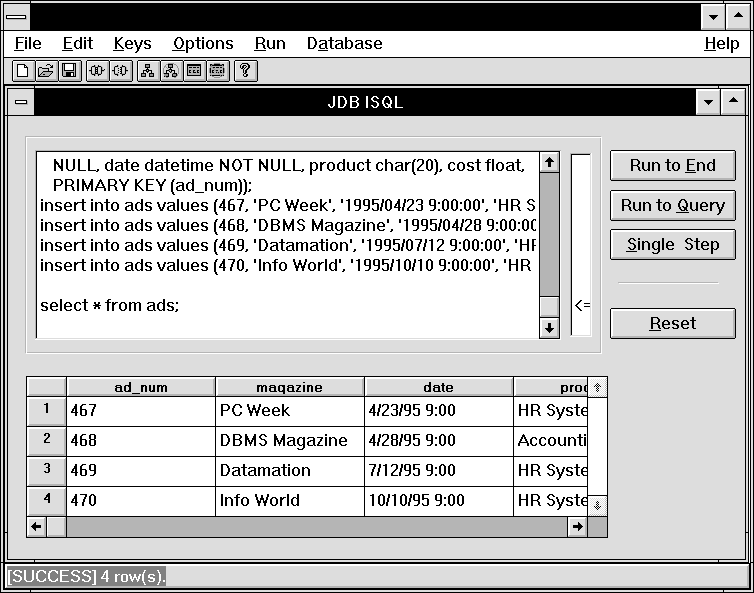
SQL SELECT statements are directed to the file and are not displayed on the screen. Output from $DESCRIBE and $DUMP macros is displayed on the screen as well as saved in the file. If the option is not selected, select sets are displayed in the lower portion of the JDB ISQL window. Refer to page 5-23 for more information on capturing and displaying query results.
Choose one of the following execution commands to execute the ISQL script. The commands are available both as push buttons on the screen and as Run menu options:
As execution proceeds, the script scrolls so that the current line is always in view. A bounce bar highlights the current line.
Caution:
JDB does not enforce referential integrity, so an error is not returned if you insert duplicate primary keys. To prevent duplicate insertions of the same statement, you may need to move the starting marker before query execution, clearing the screen, or editing the current statement.
Once you initiate execution of the SQL script, JISQL remains in execution mode until the end of the script is encountered or until you terminate execution by choosing Reset.
At any time, you can either:
To stop execution of a SQL script:
The Reset command stops execution of the SQL script, clears the output buffer, and resets the status of the JISQL utility so that you can edit the text of your script or restart execution.
When a Capturing and Displaying Query Results
SQL SELECT statement or JISQL $DESCRIBE or $DUMP macros are executed, the data retrieved can either be saved to an ASCII text file or displayed on the screen.
To save the output to a file:
 Output to File if the Output to File toggle is not currently selected. A file selection dialog box opens.
Note:
When output is saved to a file, select sets generated by SQL QUERY statements are only directed to the file and are not displayed on the screen. Output from $DESCRIBE and $DUMP macros, however, is saved in the file and displayed on the screen.
SQL SELECT statement is executed, the data retrieved are displayed in the lower section of the JDB ISQL window. This area can be scrolled vertically and horizontally to view the select set.

Output from JISQL $DESCRIBE or $DUMP macros is also displayed on the screen.
You can log and then review the following information about the execution of your SQL scripts:
Choose Options It is recommended that you use the If you specify the name of an existing file, data from the current log session overwrites the previous contents of the file. Within a log session, however, data are appended to the file, even if you execute more than one script.
Choose Run Deselect Options The text of log file How to Begin a Log Session
 Record in Log. On the file selection dialog box, specify the name of the log file.
*.log extension in naming log files, since only files with this extension appear in the file selection dialog box.
To view the information stored in the log file for the current session:
 View Log File.
To end a log session:
 Record in Log.
Sample Log File
SESSION.LOG follows:
ISQL FOR Panther, Copyright 1995-2016 Prolifics Inc.
Record Log <SESSION.LOG>: Friday April 18, 2016
<#14>:
***** Run To End execution from line 14 of 18 at 05:54:34 *****<#14>: select * from ads;
[ERROR] Table not found
********** Execution stop in line 14 of 18 at 05:54:36 **********
***** Run To End execution from line 1 of 18 at 05:54:43 *****<#4>: $logon marketing;
[SUCCESS]<#6>: create table ads(ad_num int NOT NULL, magazine char(20) NOT
NULL, date datetime NOT NULL, product char(20), cost float,
PRIMARY KEY (ad_num));
[SUCCESS] 0 row(s).<#9>: insert into ads values (467, 'PC Week', '1995/04/23 9:00:00', 'HR System', 215.00);
[SUCCESS] 1 row(s).<#10>: insert into ads values (468, 'DBMS Magazine', '1995/04/28 9:00:00', 'Accounting', 550.30);
[SUCCESS] 1 row(s).<#11>: insert into ads values (469, 'Datamation', '1995/07/12 9:00:00', 'HR System', 312.99);
[SUCCESS] 1 row(s).<#12>: select * from ads;
[SUCCESS] 3 row(s).<#14>: $logon videobiz;
[SUCCESS]<#16>: select * from titles where name like 'A%';
[SUCCESS] 13 row(s).********* Execution stop in line 19 of 18 at 05:55:03 *********
***** New Script File *****
***** Run To Query execution from line 1 of 6 at 05:57:22 *****<#1>: $logon pubs;
[SUCCESS]<#3>: $describe titles;
[SUCCESS]********** Execution stop in line 4 of 6 at 05:57:29 **********
***** Single Step execution from line 4 of 6 at 05:57:34 *****<#4>: select * from titles;
[SUCCESS] 18 row(s).********** Execution stop in line 5 of 6 at 05:57:40 **********


