


 | Getting Started-JetNet |     |
In this lesson, you enhance the Distributor Orders (dstord.scr) screen so users can query the database for a specific distributor record. You learn about Panther widget properties and how to set them appropriately.
Properties can be set and changed locally for the current screen and its components, and globally for objects throughout the application:
In this lesson, you set properties that allow users to search the database for a specific distributor by entering an identification number. The transaction manager automatically generates the appropriate SQL query statement based on this input, submits the input to the middleware API, and ultimately returns the desired distributor data to the client.
In this lesson you learn how to:
You can define the appearance and behavior of screens and widgets through the Properties window. If the Properties window is not open in the editor workspace, open it with one of these actions:
More About the Properties Window
The Properties window lets you easily view and set properties for all Panther objects—for one object at a time or for multiple objects simultaneously. If multiple objects are selected, the Properties window displays those properties that are common to all, so you can assign the same font, colors, and formats. If the selected objects have different values for a given property, three questions marks (???) are displayed as the property value.
When no widgets are selected, the Properties window displays the properties of the current screen.
Properties are grouped by category under descriptive headings on the left. Initially, the properties list is collapsed and displays only headings.
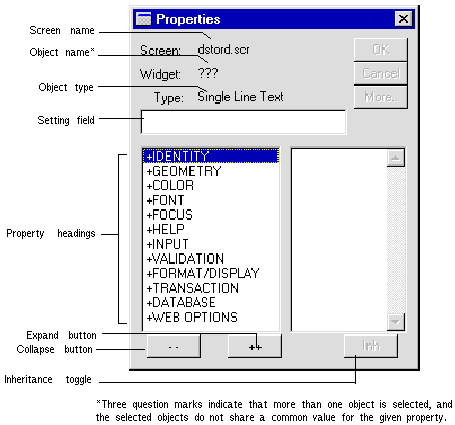
 .
.
All property headings expand, displaying the properties and their respective values on the right. To change a property value, select the property and type or select a new value in the Setting field/option menu of the Properties window.
You can also expand and collapse headings individually. To expand or collapse a single heading, simply click it.
 .
.
The properties list collapses, displaying only the property headings.
No matter how you set a property, you can reverse any change with Edit Undo or
  .
.
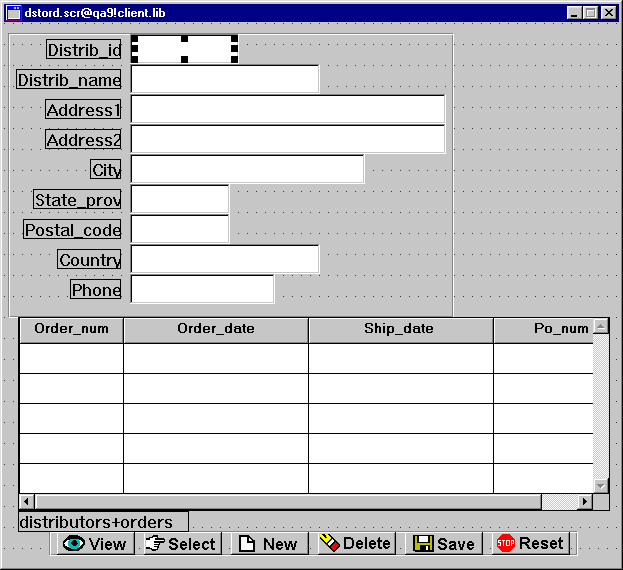
The next several steps show how to set a property on a widget at the screen level. You need to set a Database property for the distrib_id widget so that users can obtain information about a specific distributor and its orders via its ID number. The ID number is used to search for a matching record in the database.
dstord.scr, select the single line text (data entry) widget distrib_id, which is adjacent to the Distrib_id label.
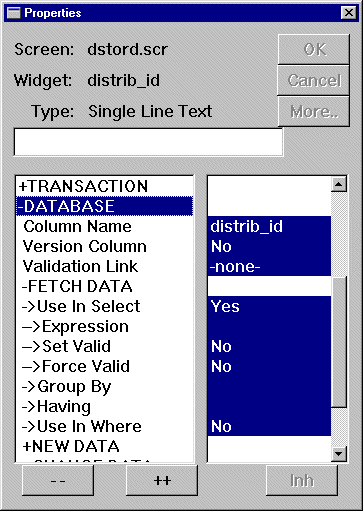
Database-specific properties are displayed.
An option menu is made available in the Properties window. Here you select from a list of predefined values.
More About Setting Predefined Property Values
You can set a property with predefined values in several ways after you select it:
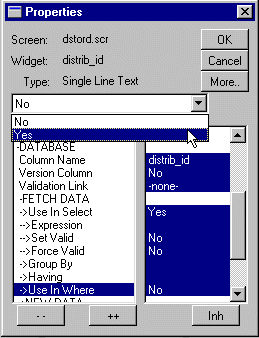
Yes tells Panther to use the field in the WHERE clause of the database query. When you change the Use In Where property to Yes, two other changes occur:
More About Inherited Property Values
The Properties window uses reverse video to show which property settings are inherited. The Inherit From property under the Identity heading identifies the source of inheritance. Objects within the repository that are imported directly from a database have their Inherit From property set to
@DATABASE.
Screens that are created by the screen wizard inherit screen, push button, and grid property values from prototype wizard-specific repository entries, while labels and data entry-type widgets inherit their property values from database-derived repository entries.
dstord.scr client screen, choose File Save or
  .
.
The screen is saved to client.lib on the application server.
It is important to keep the service component and its calling client screen synchronized, because the service component must perform the actual passing of data to and from the database server. In general, all property settings that affect processing of data must be made to both the client screen and its corresponding service component.
distrib_id single line text widget on the dstord.scr service component. Save or
  .
.The service component is saved to server.lib on the application server.
Now test the client screen to find a specific distributor's records.
The Distributor Orders screen opens in test mode.
distrib_id field. .
.
The distributor record that contains ID number 3 displays.
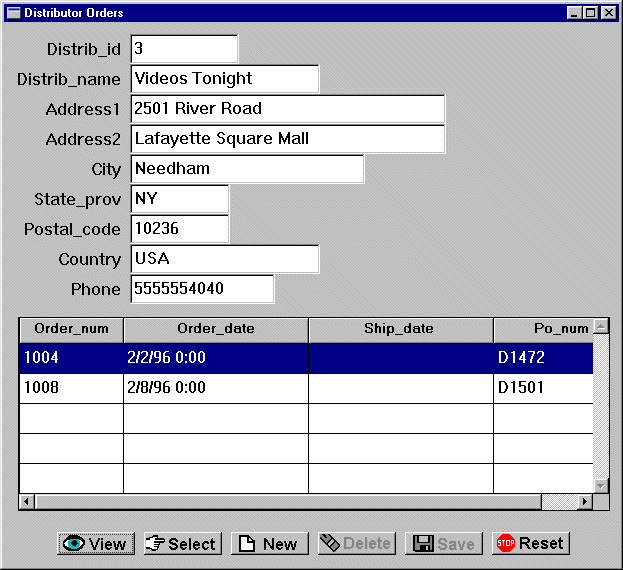
 .
.
The Reset button executes a Close command, which closes the search transaction and clears all fields of data so that you can search for another record.
distrib_id field. .
.
The distributor record that you added to the database in Lesson 9 displays and can be edited.
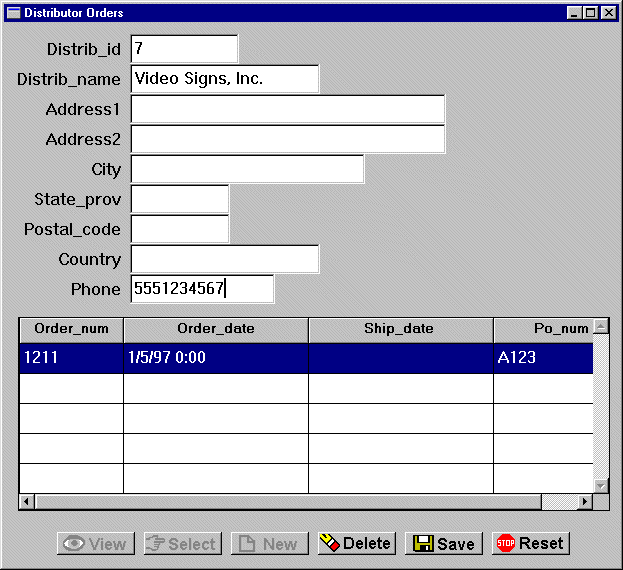
 .
.The service distributor_u is called to update the database with the changes.
The transaction closes. You can try all the buttons on the screen. However, you must remember to choose Reset to close each transaction and clear the fields.
Note:
Using the Delete button on this particular screen deletes the selected distributor and its orders. However, this also orphans records in the order_items table that are associated with the deleted orders records. Therefore, you should not delete distributors via the dstord.scr screen.
In this lesson, you created a query screen that lets a user enter data that is used to search for a specific database record. You did this by performing these tasks:
You learned:
What did you learn?


