


 | Application Development |     |
VideoBiz is a sample application that gives you a look at a working two-tier application. Although all Panther features are not implemented in this application, it is designed to illustrate some of the functionality that is possible. In addition, VideoBiz can help point out how some things can be done—and can assist you in developing your two-tier application.
VideoBiz is a database application that was built to take advantage of Panther's transaction manager capabilities. The application required very little coding—only a minimal amount of SQL and JPL code. The application screens were constructed via the screen wizard or by using widgets imported from the underlying database and inherited from a repository. Properties of these widgets, along with those of table views and links, provide the information that the transaction manager needs to drive the automated SQL generation.
This chapter describes:
Starting VideoBiz |  |
To look at VideoBiz follow the directions below for your specific platform and environment. Try the application (refer to page B-8 for more information on using the application). In the process of looking at VideoBiz, you can also invoke the screen editor to look behind the scenes to find out just how it works.
While VideoBiz is running, you are in Application mode. To see how the current application screen looks behind the scenes, you must be in Edit mode. To do this, simply access the screen editor by choosing panther Screen Editor from the application menu bar. The current screen will open in the screen editor workspace. In this way, you can see all the property specifications for the screen and its widgets, look at the JPL code that is attached to the specific screen, and see all the widgets on the screen, including those that are hidden at runtime, like table view links. To return to Application mode, choose File
 Exit from the screen editor menu bar.
How to Start VideoBiz
For Windows:
To start VideoBiz, choose the VideoBiz icon in the Panther program group. The VideoBiz Welcome screen opens.
For Motif and Character- Mode:
- Know in what directory Panther is installed.
- From your home or working directory (make sure the directory has write-per missions), run the following script:
$SMBASE/samples/videobiz/vbizunixThe script copies the required files to your current directory. They include the
videobizdatabase and the styles filestyles.sty.- When prompted, enter
cormto indicate whether you are using VideoBiz on a color or monochrome monitor.The VideoBiz Welcome screen opens.
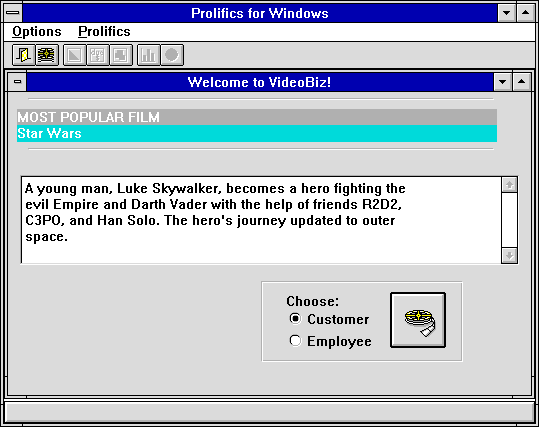
Figure B-1 VideoBiz Welcome screen includes a menu bar, a graphical toolbar, two logon options, and a display of the most frequently rented video.
VideoBiz Components
This section describes the contents of the
$SMBASE/samples/videobizdirectory and how VideoBiz uses these elements. These include:
- The
videobizdatabase
- Repository (supplied for reference; this is not runtime requirement)
The Database
VideoBiz runs against a JDB relational database,
videobiz, that has been normalized. The primary and foreign key definitions were made in the SQL table creation statements. The VideoBiz application depends on these definitions to drive the transaction manager's access to the SQL generator.The Repository
The repository
data.dicthat was created and used to build VideoBiz is provided so that you can see what kinds of things are controlled via this mechanism. Panther's visual object repository and its inheritance mechanism is a development tool used to implement and maintain application consistency, to store reusable application components, and to facilitate application maintenance as well as provide the screen wizard with the information it needs to quickly create screens. This repository contains three general types of screens: those created as the result of the database tables import process, those created and used by the screen wizard, and one that was created simply as a screen to hold frequently used objects, like push buttons.Imported Database Tables
By importing database tables as repository screens, the widgets that were derived from the database were used to build the VideoBiz application screens. Attributes of the source database table are embedded in the corresponding widget's Database properties. These properties are inherited by child copies of these widgets, and provide the SQL generator with the information needed to dynamically generate SQL statements. Changes in the underlying database tables can be re-imported into the repository and then inherited by the child screens and widgets.
Many properties imported from the database do not exactly correspond to your application's business requirements. For example, database tables imported from JDB automatically assign a Length property of 11 to widgets imported from database columns of type long. In VideoBiz, an ID number is never longer than 5 characters. This was resolved, for example, by changing the Length property of the
cust_idwidget from 11 to 5 in the repository. This ensures that wherever that widget is used in the application, its length is 5 characters long.Other properties that could reasonably be changed at the database table level were considered, and some implemented. The things to consider are:
- Does it make sense to propagate the change to every child copy in the application?
- Is it useful to control the settings of this property with inheritance?
Some of the property changes made in the repository include input keystroke filters, the Length property, font specifications for data entry widgets, and data format specifications (for instance, date formats).
Other Repository Entries
Repository-based inheritance was also used to define standard widget types (in this case, push buttons). These are stored in the repository screen
masters.wgt. The appearance of the push buttons on the application screens is inherited from this repository screen. In this manner, a consistent look is propagated and easily maintained.Wizard entries (
smwizardandsmwizis) were automatically created when the screen wizard was first invoked.Application Screens
The VideoBiz screens were created by using the screen wizard. The wizard uses the database-derived widgets in the repository to build screens.
While you navigate through the VideoBiz application, you can also examine what's going on behind the scenes (or screens) by invoking the screen editor (choose panther
Screen Editor). The current screen will open in the screen editor workspace and you can see how the screen was put together, what properties were set, and which properties are inherited from the repository (these are displayed in reverse video in the Properties window).
When you are done, resume the VideoBiz application by choosing File
Exit from the screen editor menu bar.
Menu Bar/Toolbar
The menu bar and toolbar in VideoBiz is used primarily for navigation among the modules. Panther's menu bar editor was used to create the menu script file. The menu script is read into memory when the Welcome screen opens. It remains in place for the life of the application.
Items on the Options menu become active or inactive depending on the user's permissions and the currently active screen. For example, a user with customer permissions will not be allowed to run reports or view customer profiles.
A Panther menu option is also provided on the menu bar to allow you to easily access the Panther editors and to view the SQL that is being automatically generated for the VideoBiz application. This menu bar item would normally not be part of a distributed, runtime-only application, but is provided for your convenience.
JPL Code
All of the coding in VideoBiz is done with JPL and is well-documented. There is one externally stored file,
videobiz.jpl, which is called when the first screen (main.jam) is opened. All the procedures contained in this file are then globally available to the application. This is particularly useful when a procedure is used by more than one screen. For example, the procedureinit_menuis used throughout the application.All other JPL code is stored with the screens that use it.
Styles Sheet
The default Panther
styles.styfile was modified to accommodate the VideoBiz application. This file controls how widgets behave when different transaction modes are executed.Sample Reports
The Marketing portion of VideoBiz generates reports. If your Panther executable includes ReportWriter, edit the
videobiz.jplfile to let Panther know this. Change the following line:RW_INSTALL = 0to
RW_INSTALL = 1The report templates are provided as Panther screens by the ReportWriter installation. You can see how they are constructed by opening them in the screen editor; they are:
duenote.jam,topten.jam, andgenrecus.jam.Pixmap Files
There are several pixmap files provided that serve to enhance the VideoBiz application on GUI platforms. There are pixmap files used for push buttons, toolbar items, for the screen when it is minimized, and for screen wallpaper.
The User's Guide to VideoBiz
This section serves as a functional specification for the VideoBiz user interface. The specification is usually where an application begins. A task is introduced and a solution is sought. The user's perspective introduces you to what VideoBiz is intended to do and what functions it will perform.
What is VideoBiz?
VideoBiz is a small database application that is intended for use in a video rental store. It serves three audiences and provides functions specific to those audiences:
- Customers—to look up information about videos.
- Marketing personnel—to produce reports about customers and the videos they rent.
Starting VideoBiz
VideoBiz runs on free-standing terminal kiosks in the video store for customer use as well as on work stations behind the front desk for employee use.
The Welcome (
main.jam) screen displays when the application is idle, that is, when no one has logged on, and it shows the title and description of the most frequently rented video.The application's menu bar offers two menu bar items: Options and Panther. The toolbar includes all entries available via the Options menu. On initialization, the only available choices under Options and on the toolbar are Video Search and Done/Exit. The user can choose Video Search to search for a video by title ID, title, and/or director.
The Panther menu is provided for your convenience to give you access to the Panther editors so that you can examine the internals of the application. This option would normally not be part of a runtime application.
The Welcome screen also includes two radio buttons:
- Customer—The default radio button. When this button is selected, pressing Enter or choosing the Start button invokes the Search for a Video screen. (Under GUI platforms, the Start button displays a pixmap of a 35mm camera reel on it.)
No log on information is required. The application navigates to the Video Lookup screen when the Start button is chosen. Video Search and Done are the only available menu options when the screen is in Customer mode.
- Employee—Requires the user to enter a user name and password. When this button is selected and the required login data is provided, pressing Enter or choosing the Start button invokes the Customer Search screen.
How to Log into VideoBiz as an Employee
- Choose the Employee radio button. The log on fields (Name and Password) are displayed.
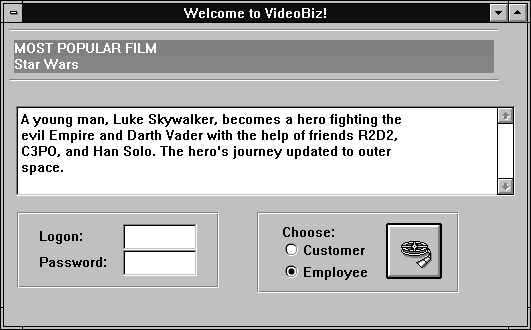
Figure B-2 The Welcome screen displays logon and password fields for employee access.
- Enter the name
sheilain the Name field, andtrade3in the Password field. (The password is echoed using asterisks (*).)Both user name and password are required. An error message is posted if both are not provided. Otherwise, logon information is compared to a list of valid names and passwords. An invalid user name or password invokes an error message and the user can try another.
- Choose the Start button (or press Enter). The Search for a Customer screen opens.
Connection to the database occurs upon initial screen entry. On entry, the screen is by default in Customer mode. If a valid user/password is entered, the application switches into Employee mode. While in Employee mode, the marketing menu/ toolbar items are active. When a user returns to the Welcome screen, the application automatically switches back to Customer mode.
How to Exit VideoBiz
Choose Close/Quit from the application's system menu. Panther prompts you to confirm the termination of your session in VideoBiz.
Behind the Scenes
The
main.jamscreen includes the following features which you can examine by accessing the screen editor:
- When the screen opens it calls
videobiz.jplto install the application menu and JPL procedures, making them globally available to the application.
- Call to
init_menuto turn on the applicable menu/toolbar selections.
Identify the Customer
When the user successfully logs in as an employee, the Search for a Customer (
custlist.jam) screen opens.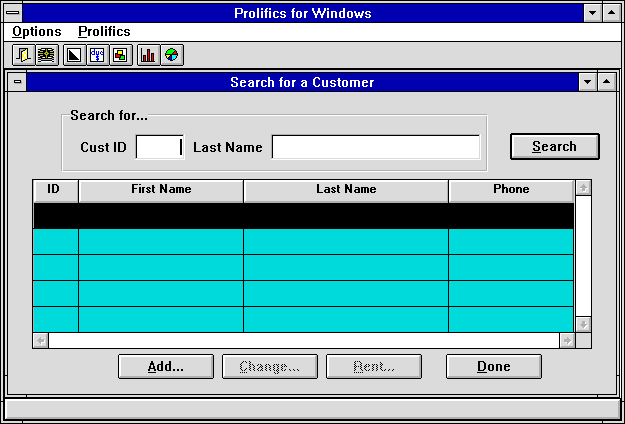
Figure B-3 Customer search screen allows employee users to search for specific customers.
This screen allows the employee to search for an individual customer and select an action for that customer. The screen includes two query fields and a grid widget which displays the results of the query—the customer's ID, first and last names, and phone number. A bounce bar can be moved up and down in the grid to indicate the currently selected customer. The screen includes several push buttons and Customer Profile menu bar/toolbar options that invoke other screens.
The top portion of the screen provides two fields on which the user can query. Customer records can be searched in two ways: by customer ID or by full or partial last name.
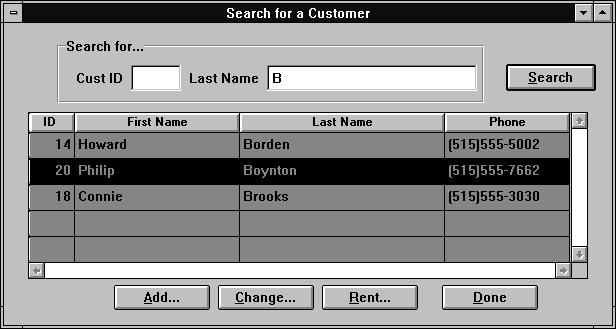
Figure B-4 Search for a specific customer record using an ID number or last name.
How To Search for a Customer Record
- Specify the search criteria by doing one of the following:
- Enter a customer ID in the Cust ID field at the top of the screen, and choose the Search button (or press Enter).
If there is a corresponding customer record, the data are displayed in the grid widget.
- Enter a full or partial string in the Last Name field at the top of the screen, and then choose the Search button (or press Enter).
All records that match the search criteria are displayed in the grid widget. For example, if the user enters B into the Last Name field, all customers whose last names begin with B are displayed.
- Choose the Search button (the screen's default button) or press Enter.
All customer records are fetched, and are displayed in alphabetical order in the grid widget.
Choosing the Search push button or pressing Enter (activates the screen's default button) triggers a search using the contents of the query fields as criteria. At any point, the user can enter a new search string or customer ID in the query fields and trigger a new search by selecting the Search button (or pressing Enter).
If no records match the search criteria, the application prompts the user to add a new customer. If the user chooses Yes to add a new customer, the Customer Information screen opens. If the user chooses No, new search criteria can be specified.
- Select the desired record by doing any of the following:
- Specify the kind of action to take by doing any of the following:
Behind the Scenes
The
custlist.jamscreen includes the following features which you can examine by accessing the screen editor:
- Query by example allows the user to enter search criteria. The Use In Where Operator property for query fields defines what data to fetch that matches the search criteria.
- The Double Click property is set on each of the grid members.
Add/Update Customer Records
The Customer Information (
custedit.jam) screen displays detailed information about a selected customer. The user arrives at this screen for one of two reasons: to add or to change a customer record. Once the record is inserted or updated, choosing OK commits the additions/changes.The Cancel button closes the Customer Information screen without saving any changes, and returns the user to the customer search screen.
How to Insert a Customer Record
- Choose the Add push button on the Search for a Customer (
custlist) screen or respond to the application prompt to add a new customer (when a query results in no matches).The Customer Information screen opens in New mode.
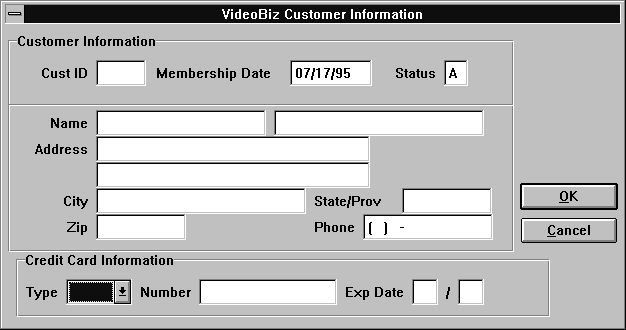
Figure B-5 Customer Information in New mode initializes the Membership Date to the system date and the Status field to A, for active. Also, any string that the user entered in Last Name query field on the Search for a Customer screen is passed to this screen and is displayed in the Last Name field.
- Tab or click to each field and enter the customer demographics and credit card information.
The Cust ID, Membership Date and Status fields are protected from input. All other fields are ready for data entry.
- Choose OK to accept the information. The application assigns a customer ID number and displays a confirmation message.
The OK button executes a procedure to assign a customer identification number and to insert (save) the new record to the database because a New command was specified. Once the confirmation message is acknowledged, the screen closes, and the user returns to the customer search screen.
How to Update a Customer Record
- Select a customer in the grid and choose the Change button or double-click on a customer record on the Search for a Customer (
custlist) screen.The Customer Information (
custedit) screen opens.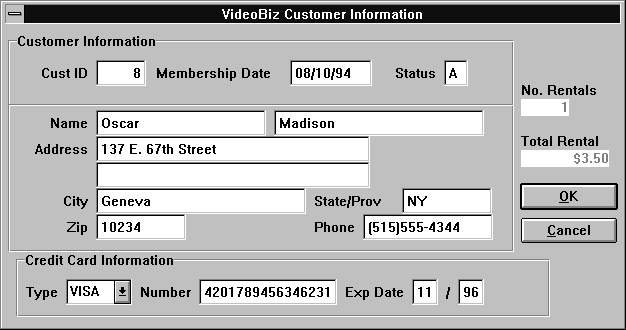
Figure B-6 The Customer Information screen displays data associated with the selected customer record.
- Tab or click to the fields that require change.
All fields are updatable, except for the customer ID and the rental information fields.
- Choose OK to commit the changes to the database. An update confirmation message is displayed.
When updating an existing record, the OK button performs an update of the database. Once the confirmation message is acknowledged, the screen closes, and the user returns to the customer search screen.
Behind the Scenes
The
custedit.jamscreen includes the following features which you can examine by accessing the screen editor:
- Receives a transaction manager command and data from the Search for a Customer (
custlist.jam) screen and performs aCOPYorSELECTcommand, depending on what action the user has specified.
Video Rental Listing
Users with "front desk" permissions can reach the Video Rental Listing screen by first identifying and selecting a customer record from the Search for a Customer screen and then choosing the Rent push button.
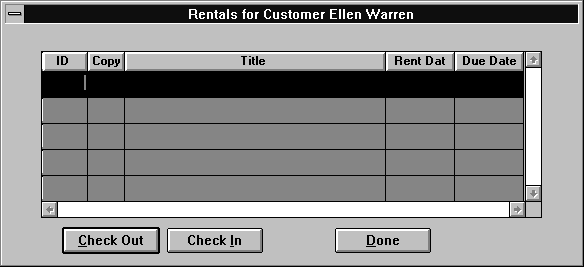
Figure B-7 The Rental Listing screen displays videos currently rented by the customer (indicated in the screen's title bar).
The selected customer's identification number and name are sent to the Video Rentals (
rentlist.jam) screen; the customer's name is displayed in the screen's title bar. All videos that are currently rented by the selected customer are listed; if there are no videos out, the grid is empty, and ready for Check out.From the
rentlistscreen, the user can:
- Choose the Check Out button to rent additional video titles. The Video Rental (
rentvid.jam) screen is displayed.
- Select the video from the list.
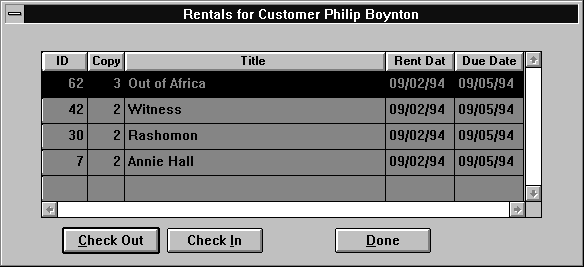
Figure B-8 The rental date and due date are indicated for each video title.
- Choose the Check In button.
Repeat these steps for each return.
Behind the Scenes
The
rentlist.jamscreen includes the following features:
- The screen receives the
cust_idand the customer name from thecustlist.jamscreen and runs a query to find what videos the customer currently has out.
- The Check In button updates the rental status and redisplays the screen.
Rent Videos
It is expected that in this video store, the customer brings the video cassette to the front desk when he or she wants to rent a movie. The video itself has the ID and copy number printed on the container. The front desk clerk can just type that information into the application.
How to Rent a Video
- From the Rentals (
rentlist) screen, choose the Check Out button.The New Rentals (
rentvid.jam) screen opens.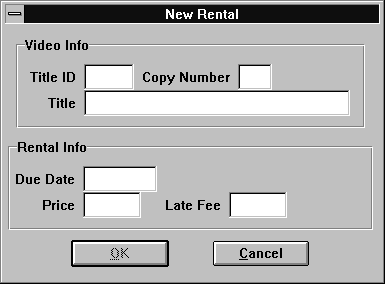
Figure B-9 New rentals require a title ID.
- Enter a title ID and press TAB.
The application displays the video title associated with the specified ID number. If a title ID does not exist, an error message is displayed.
- Enter the tape copy number (usually a number between 1 and 3 inclusively) and press TAB.
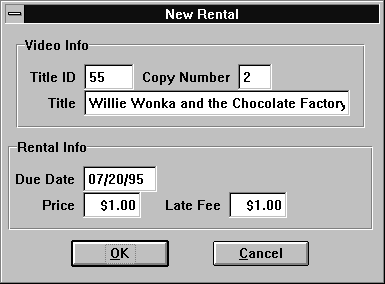
Figure B-10 An available copy of the video automatically provides the due date and price of the rental as well as the late fee charge.
If the video associated with the specified ID and copy number is, in fact, available, the cost of the rental, late fee rate, and due date are displayed.
If the specified copy number is not available (it's already rented by another customer or does not exist), an error message is displayed. Another number can be entered.
- Choose OK to record the rental. The New Rentals screen closes, and the Rentals list is updated with the newly rented video titles.
Behind the Scenes
The
rentvid.jamscreen includes the following features:
- Receives the
cust_idfrom the Rentals (rentlist) screen.
Customer Profile
The Customer Profile options are only available to a user logged in as an Employee. A customer profile provides two different graphical representations of the types of videos a selected customer has rented.
How to Obtain a Customer Profile
- Select a customer from the Search for a Customer (
custlist) screen.- Choose the design chart format by doing either of the following:
- Choose Options
Profile
Bar Chart or

The selected customer's rental profile is displayed in the bar chart format.
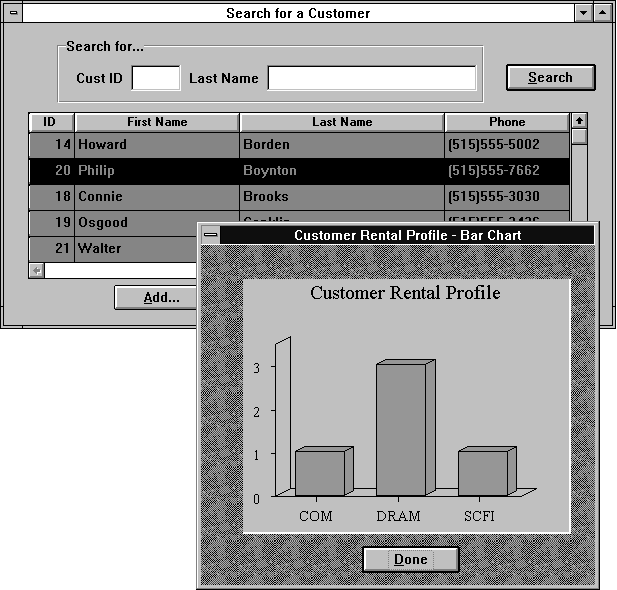
Figure B-11 Rental profile illustrates the customer's rental preferences by category.
- Choose Option
Profile
Pie Chart or

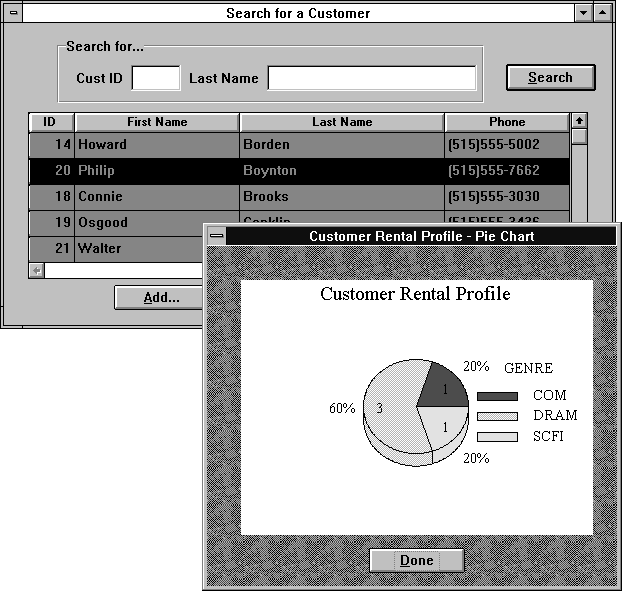
Figure B-12 The selected customer's rental profile is displayed in pie chart format.
- Choose Done to return to the Search for a Customer screen.
Behind the Scenes
The bar chart and pie chart screens include the following features:
- The
cust_idis passed from thecustlistscreen and is used to execute the query.
Video Lookup
The user can access the video lookup portion of VideoBiz by doing either of the following:
- Logging into VideoBiz as a customer (choosing the Customer radio button on the Welcome screen)
The Video Lookup consists of two screens: Video Listing and Video Detail. The Listing screen allows the user to search for a video by title ID, movie title, or director. It fetches all records that match the search criteria and displays the results in scrolling lists. From this screen, the user can access the Video Detail screen, which displays all information about a selected video.
Querying the Database and Selecting a Video
The Search for a Video (
vidlist.jam) screen allows the user to search for a video and select one from the results. The screen consists of four query fields and a grid widget that contains four columns for displaying query results.The grid widget lists the video ID, movie title, director, genre, and rating. The grid widget can be shifted from left to right to display offscreen columns. A bounce bar can be moved up and down in the list to indicate the currently selected title. The screen includes a Search button to execute the query, a Detail button that invokes the video detail screen, and a Cancel button to return the user to the calling screen.
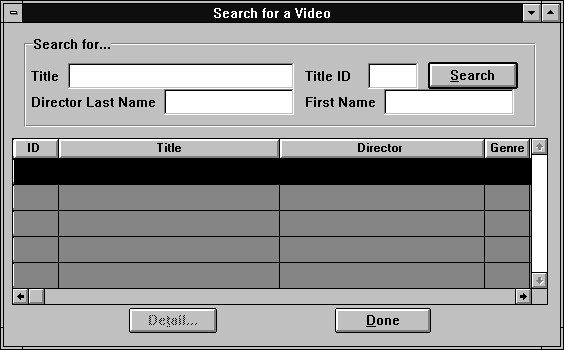
Figure B-13 Query for videos using title, ID, or the director's name.
How to Search for a Video
- Specify the search criteria by entering a title ID or a combination of one or more of the following:
- Enter a full or partial string in the Title field at the top of the screen, and then choose the Search button or press Enter.
- Enter a full or partial string in the Director First Name field and choose the Search button.
All records that match the search criteria are displayed in the grid widget in alphabetical order by title. In addition to the title and director's name, the rating (e.g., PG (parental guidance), R (restricted), etc.) and genre (e.g., comedy, science fiction) of each title are displayed. The arrays scroll to accommodate more titles than can fit on the screen, and a bounce bar allows the user to select a video title from the list. A horizontal scroll bar allows the user to display offscreen columns in the grid widget.
If the user chooses the Search button without specifying any search criteria, all videos in the database are displayed in alphabetical order by title.
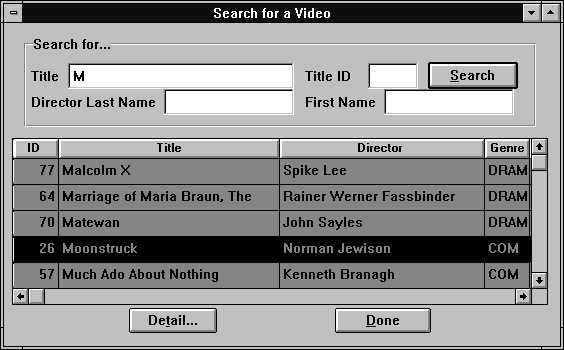
Figure B-14 Query results are displayed in a grid widget.
- Select the desired record by doing any of the following:
- Choose the Detail button. The Detail button invokes the Video Detail screen.
- Choose Done to close the Search for a Video screen. If the user is a customer, the Welcome screen appears. Otherwise, the user resumes on the screen that was open when he or she chose the Video Search option.
Behind the Scenes
The
vidlist.jamscreen includes the following features:
- Functions in the same way as the customer search screen (
custlist.jam).
- The
title_idselected in the grid widget is sent to the video detail screen.
View Video Details
The Video Detail screen (
viddtl.jam) displays detailed information about a selected video title. The user arrives at this screen as a result of specifying search criteria, querying the database, and selecting a video title from the results. The upper portion of the screen displays general information about the selected video (for example, title, length in minutes, rating code, and pricing category (displays only if the user is an employee)). The middle portion displays a scrolling text area with a description of the video. The grid widget in the lower portion of the screen displays the actors who appear in the film and the roles they play.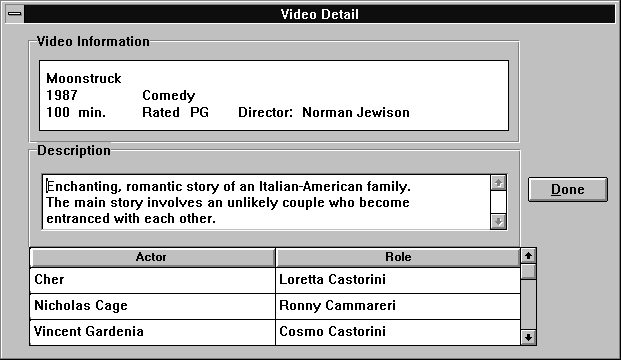
Figure B-15 Video details display data from three database tables: titles, title_desc, and actors.
When the user is finished reading the details of the video, choosing the Done push buttons closes the Video Detail screen and returns the user to the Search for a Video screen.
Behind the Scenes
The
viddtl.jamscreen includes the following features that you can examine by accessing the screen editor:
- Open the DB Interactions window to see how the table views on this screen are linked. The screen executes two server joins and two sequential joins.
Marketing
You can access the Marketing portion of VideoBiz by choosing Options
Marketing from the menu bar or one of the corresponding toolbar items. Data are passed to reports and displayed.
How to Run Marketing Reports
- The user must log onto the application as an employee to active the marketing menu/toolbar options.
- Choose the desired report:
- Choose Option
Marketing
Top Ten or

Lists the ten most frequently rented videos.
- Choose Option
Marketing
Due Notice or

Produces a letter addressed to each customer who has overdue rentals as of this reporting period. The letter lists each overdue rental by title and the amount due.
- Choose Option
Marketing
Genre or

The user is prompted to select from a list of genre categories.
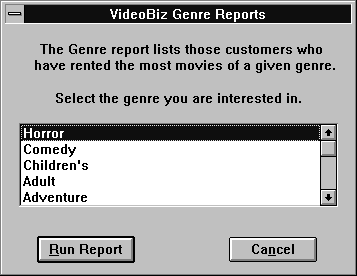
Figure B-16 You can generate a report by choosing a particular category of video.
- Select a category and choose Run Report.


