

 | Getting Started-2-Tier |     |
After an application's basic functionality is in place, you typically continue to work on it to fine tune its behavior and usability. This lesson shows how to:
A widget's Double Click property can be set to a control string that determines what happens when users double-click on that widget. In this lesson, you edit the client screen dstslect.scr to control what happens when a user double-clicks on a distributor record in the grid widget. The grid widget columns' Double-click property is set to call the send_dst_data procedure, which displays the selected distributor's record for editing. Thus, double-clicking on any grid widget field emulates the behavior of the Orders button (described in Lesson 8 and Lesson 9).
dstslect.scr client screen and in the grid widget, select widgets distrib_id, distrib_name, and phone by selecting grid columns Distrib_id, Distributors, and Phone columns:
^send_dst_data("SELECT") for these widgets.
When the user double-clicks in any of the columns in the grid widget, the send_dst_data procedure executes (as it also does when the Orders push button is chosen) and sends the selected ID to the dstord.scr client screen.
dstord.scr client screen and select all the columns in the grid widget.^send_order_data() for these columns.
When the user double-clicks on a specific order, the send_order_data procedure, which is associated with the dstord.scr screen, is called. This procedure is described later.
When you edit an existing distributor's data or add a distributor on the dstord.scr (Distributor Orders) screen, it is not immediately visible when you return to the dstslect.scr (Select Distributor) screen. You can enhance the screen entry procedure on the dstslect.scr client screen so that when the screen redisplays (after the Distributor Orders screen closes), a View command automatically executes. This causes the updated database records to redisplay.
dstslect.scr client screen:
send_dst_data procedure. Insert From Library. The Open JPL Module dialog opens.
tutorstd.lib by choosing Open and selecting it from the Open Library dialog.
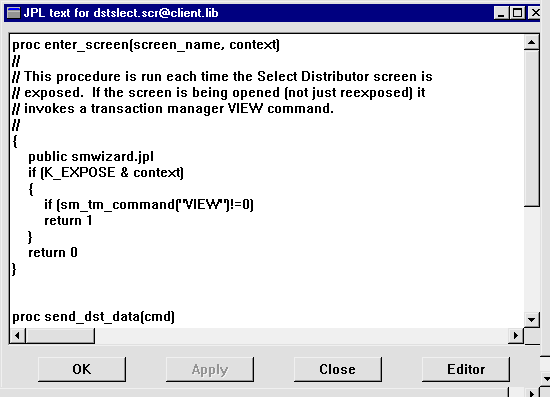
The The expression in the if statement tests the K_EXPOSE bit in the 
enter_screen procedure for the dstslect.scr client screen is read into the JPL Program text window.
proc enter_screen (screen_name, context)
{
	public smwizard.jpl
	if (K_EXPOSE & context)
 	{
		if (sm_tm_command("VIEW")!=0)
			return 1
	}
	return 0
}context argument. If the expression evaluates to true (the screen was reexposed), the View command executes and the updated database records are displayed. otherwise, the procedure returns without performing any actions.
Now when you add or edit a distributor record, those changes should display immediately after you return to the Select Distributor screen.
dstslect.scr client screen. Test Mode or
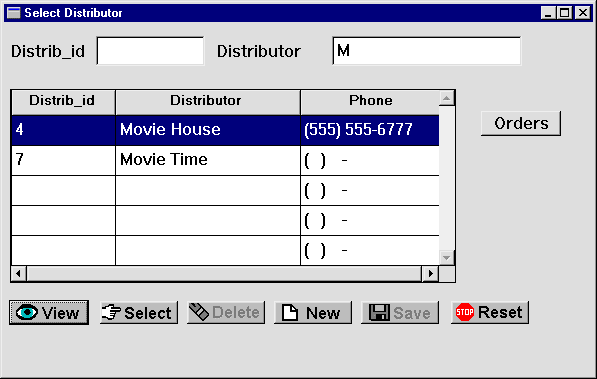
The Select Distributor screen opens.
M in the Distributor field and choose
All distributors having an uppercase M in their name are displayed, including the one you added in Lesson 9.

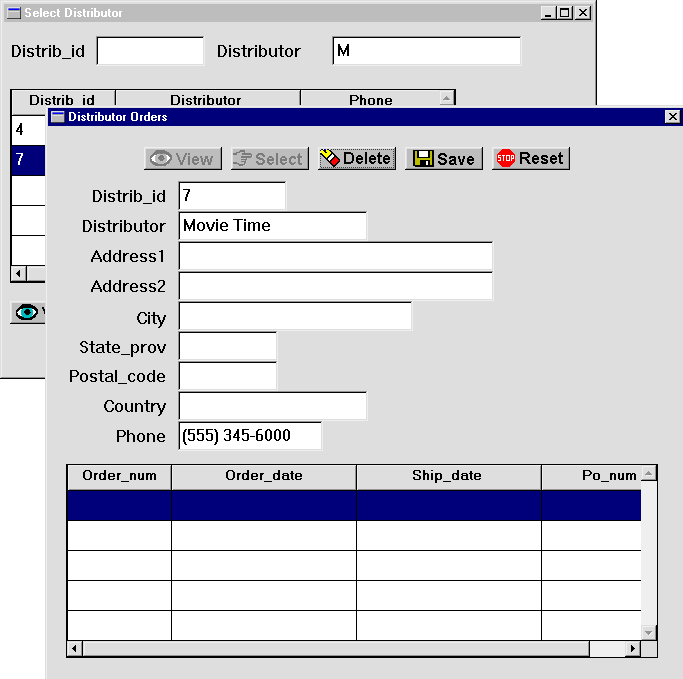
Movie Time row.
The Distributor Orders screen opens, overlaying the Select Distributor screen.

(555)345-6000 in the Phone field and choose Save.The Select Distributor screen regains focus. The phone number shows the new data that you just saved to the vidsales database.
 Save All).
You enhanced the user interface by performing these tasks:
send_dst_data procedure by double-clicking on a specific distributor record on the Select Distributor screen. This action invokes the procedure and sends the selected ID to the Distributor Orders screen.
You learned:
What did you learn?


